|
|
||||||||||||||||||


|
|
 10-28-2010, 03:38 AM
|
#1 |
|
"Toot" Spelled inside out
Offline Posts: 2,297
 -->
-->
Join Date: Oct 2009
|
Using a smaller piece of hanger and placed in the right part of a figure can make the figure look like they're leaping through the air in a martial arts move.
Here I stuck a small piece of hanger into QK's foot peg hole and positioned him with his other foot against the BAT. Since the BAT is leaning slightly backwards from the kick, he wouldn't stand very well, so what I had to do was place QK's forward foot against the BAT's throat and push the head down over QK'S foot, this way they are actually supporting one another. 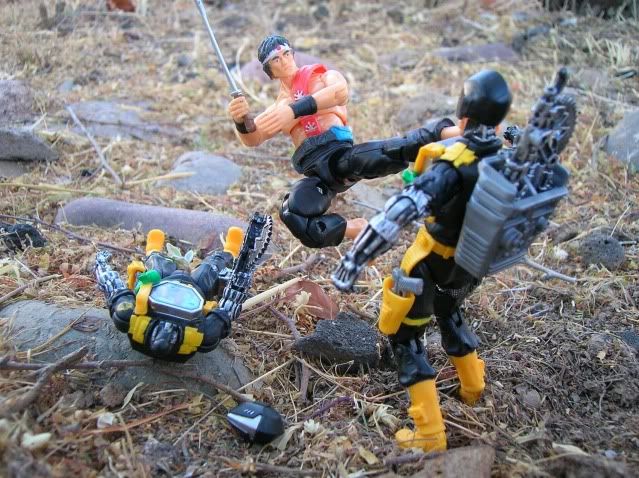 In this shot, the small piece of hanger was (I'm gonna try to make this as clean as humanly possible...) placed in the small, open space between Lady Jaye's thigh and her waist. Anyone who has dirty thoughts about that needs help. I'll be back in a little while. When I first tried this shot, I posed LJ in this position and tried to use some string to hang her from above. This didn't work because there was no place to tie the string that would work with her center of gravity to give her the "in flight" look. 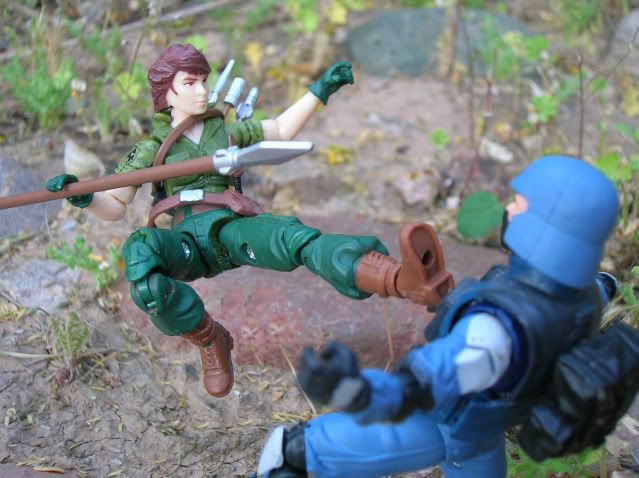 Or being a typical extreme California surfer dude and jumping a motor cycle with a machine gun mounted on it. 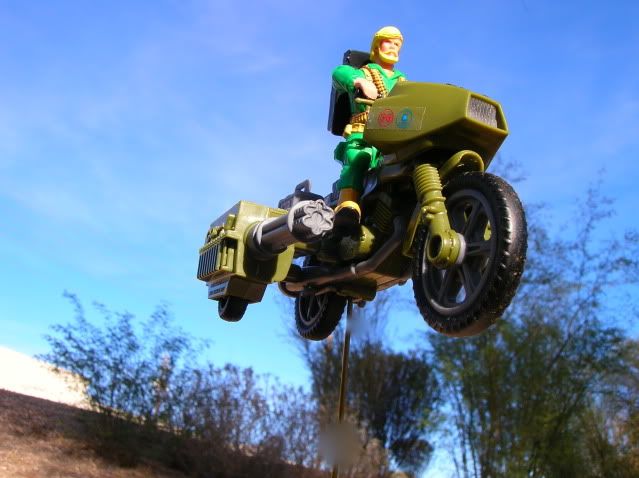 Launching a missile from a Stinger... 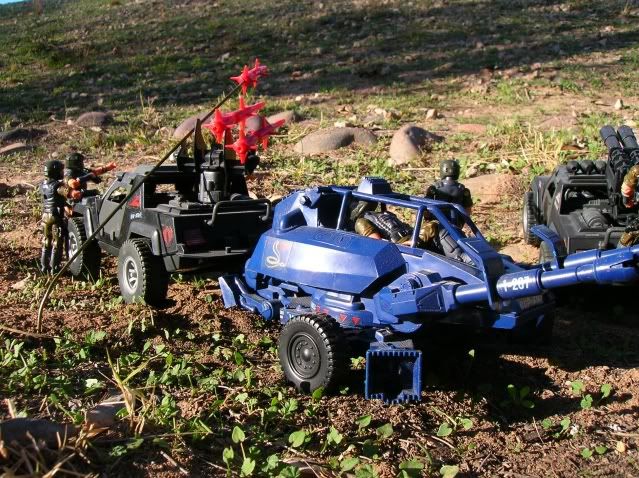 Or better yet, catching some air in a HMMWV. These are partially edited, but you can still see where the hangers were used. These pictures show you that there are almost limitless options on how to use this technique.  I mentioned above that some of the bigger aircraft need two hangers for support. Well, some of the smaller guys can get away with one, like the FANG, the RHINO's helo, Serpentor's Air Chariot, the Flight Pod and the Firebat. Keep this in mind if you're using the one hanger approach with one of the smaller flying machines: they are more unsteady and require some serious patients and a lot of adjusting
__________________
The United States will conquer Terrorism with the help of God and a few Marines. Some people, when trying to avoid thinking about those things that cause them pain, turn to drink, or perhaps food, or drugs... I turn not to any of those... I collect action figures, turning my mind to the hunt, so that I might find a mote of peace... Over the years, I've found that alcoholism is much more socially acceptable by far. |

|
|
10-28-2010, 03:39 AM
|
#2 |
|
"Toot" Spelled inside out
Offline Posts: 2,297
-->
Join Date: Oct 2009
|
The FANG picture I took recently is an example of a single hanger and a lot of pains taking preparation. It took me about a half an hour to get the stupid thing to stay stable enough for me to photograph. Notice in the picture there is a large chunk of wood at the bottom of the hanger. That was there to stabilize the helo. I drove the hanger into the ground about eight inches and because the hanger was so top heavy, it kept falling over, so I put the wood next to the hanger in the direction the thing would fall and that seemed to work, but, it meant more editing for me to do.
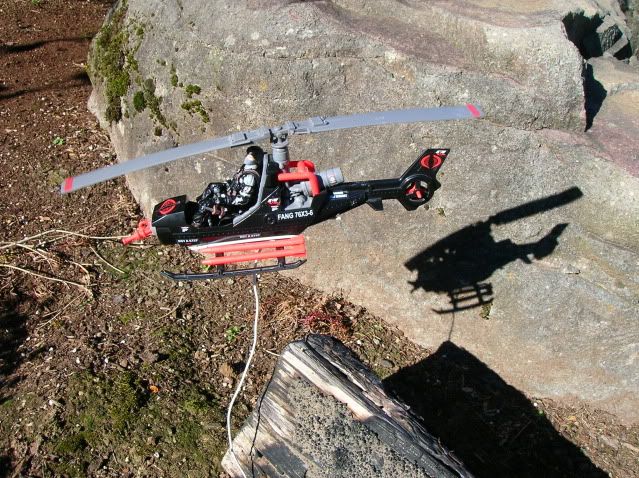 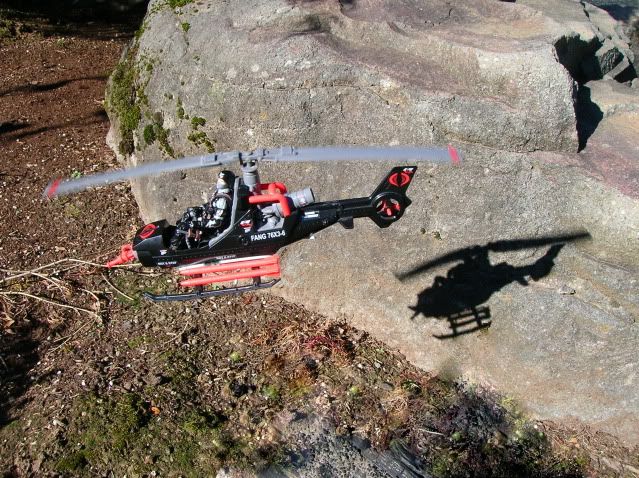 Can you see on the FANG that there is something white between the black fuselage and the red missiles? This is the hanger. Some aircraft have holes in their fuselage where you can stick the wire hanger for stability. The FANG has no such holes, so I had to wrap the hanger around the top of the landing skids then bend it down towards the ground. This still wasn't enough to get the thing to sit atop the hanger easily. I then had to find the FANG's center of gravity and run the hanger down from there. As the hanger is in the ground, you'll see the FANG lean one way or another and you can bend the hanger around the compensate a little, but you'll just have to play around with it before you can get it to work just right. I didn't want to use the two "U" shaped hangers on this one because I wanted the helo to have a bit more altitude then the two hanger system would have really allowed for. These Firebats were really easy. I just shoved the hanger up their tail pipes and let them bend forward. I put the hanger in the ground next to a large rock that was in the direction the hangers were leaning and it kept the two planes off the ground enough that they looked like they were flying really low; the effect I was going for. 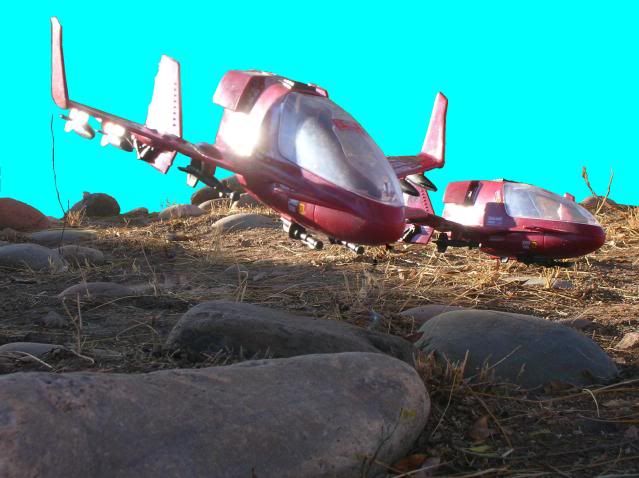 Briefly: Notice the shadow on the rock below the FANG. To me, this sells the shot. This makes it believable that that FANG is really in the air. If the FANG had been super-imposed over the background of the rock and the ground, trying to match the shadow is one of the most difficult things to do. There are times I've seen the shadow left out when it should have been there and for me that takes away from what can be an otherwise great picture. Taking pictures from the ground up, as if you were someone on the ground taking a picture of the FANG flying over head is another great way to sell the shot.
__________________
The United States will conquer Terrorism with the help of God and a few Marines. Some people, when trying to avoid thinking about those things that cause them pain, turn to drink, or perhaps food, or drugs... I turn not to any of those... I collect action figures, turning my mind to the hunt, so that I might find a mote of peace... Over the years, I've found that alcoholism is much more socially acceptable by far. |
|
|
|
10-28-2010, 03:40 AM
|
#3 |
|
"Toot" Spelled inside out
Offline Posts: 2,297
-->
Join Date: Oct 2009
|
OK, now the moment you've all been waiting for..."How on God's green Earth do you get those awesome rotor movement shots?!?!" If that wasn't the moment you were waiting for, go sit in the corner and play quietly until this section is over.
This is probably the HARDEST, MOST DIFFICULT and NOT EASY thing you can possible do for a perfect helicopter in flight shot. Are y'all ready for this? (insert cool techno song here) You spin the rotors by hand. Honestly. That's all there is to it. Just spin those suckers like you did when you were a kid playing with these things. So far, I have found that the rotor blades of the NAC, the Dragonfly, the FANG, the RHINO's helo and the bbi MH-6 Little Bird all spin very freely. The Tomahawk...not so much. I think that has more to do with the weight of the rotor blades pulling down on the hub and there's a lot more surface area to cause friction there. I'm not saying it can't be done, it's just a lot more difficult. I did manage to get one picture of my custom Tomahawk with the rotors spinning and it took a few tries as you have to spin both, pick up the camera, frame it up and take the picture. 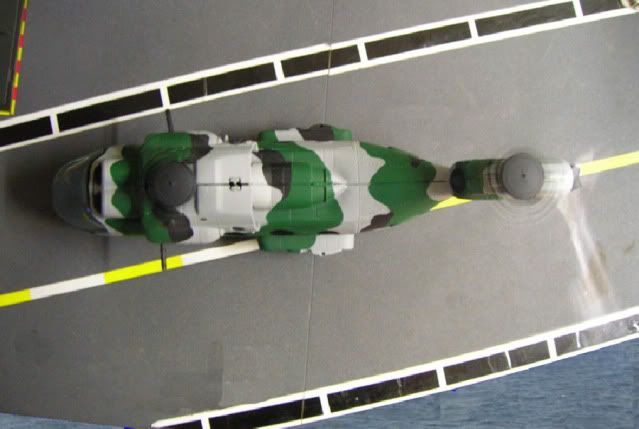 As I said, this is very simple, but here's where you need to take a bit of caution. Again, referring to my recent FANG shot. The FANG was precariously balanced atop that thin hanger. The first time I spun the blades, it caused the hanger to fall over, so I had to hold the FANG in place, spin the blades and then try to take the picture. Usually I can get the blades spinning and get about three or four shots before I have to spin them again. After you spin them, give them a moment to slow down. It makes for a better shot as you can see the blades in you shot with the blur motion. Take note of the above custom tomahawk's rotor spin. I didn't let them slow down before I go the shot and they're barely noticable. This spinning technique is why you can't use the fishing line/string method for shooting aerial shots of the helos. Since the string would most likely be connected to the top of the rotor, you wouldn't be able to spin it. So...now you've got your airplane or helo or jet pack or Karate kicking ninja all set up on their wire hanger, lookin' flawlessly in motion and totally awesome. Now, take your picture. Click...perfect...there it is...oh, but what is that stupid looking piece of wire hanger doing in the shot? It totally ruins it! This is where your editing software come in. Since all photo editing programs are different, I can't elaborate too much here, so I'll tell you what works for me on Picasa and the Adobe PhotoDelux. On something as simple as the FANG picture, I used Picasa to edit out the hanger and the piece of wood. There is a "touch up" tool to use. Move your circle cursor to an area next to the wire and click the mouse. This, in a way, sucks up what ever is in the circle. Now move the mouse over the top of the hanger and click the mouse again. This deposits what ever you sucked up over the top of the hanger. You want to take parts of the back ground from right around the object to be covered so the backgrounds match. This is a lot easier the "busier" the background is with foliage or dirt and rocks and it will blend in better. Using the PhotoDelux, I use a cloning tool. Again, starting at a point right by the object I want to cover so the back ground matches, I clone over the hanger to make it disappear. Where you need to watch using these tools is when you come to straight lines like tree branches or the edge of your plane. If your clone alignment is off the slightest, the lines will be off and noticeable. This takes some practice and some fooling around. You'll probably have to have a few goes at it before you can get it right. Thankfully, that is what ctrl Z (the command, not the photographer) or the undo button are for. Usually your changes will be small enough that they won't really be noticeable. There are a few shots I've taken where I know where the edit is and I can't find it. While I prefer shots of my aircraft to be real and where they are, I will use a superimposed shot from time to time as well. Going back to the shot of my Skystriker hanging by a string in the tree, I will trace the plane in a colour that contrasts with the colour of the plane and make it a wide area around the plane that is this different colour. The reason for this is so that when I do trace the plane with the editing program's cutting tool, the edges are easier to find. Most editing programs nowadays even have a smart selector where you can just run the cursor along the edge of what ever it is you want to cut out and it automatically finds the edges for you. If the colour of the back ground and the colour of the subject are too close, the smart selector will have a hard time finding the edge. 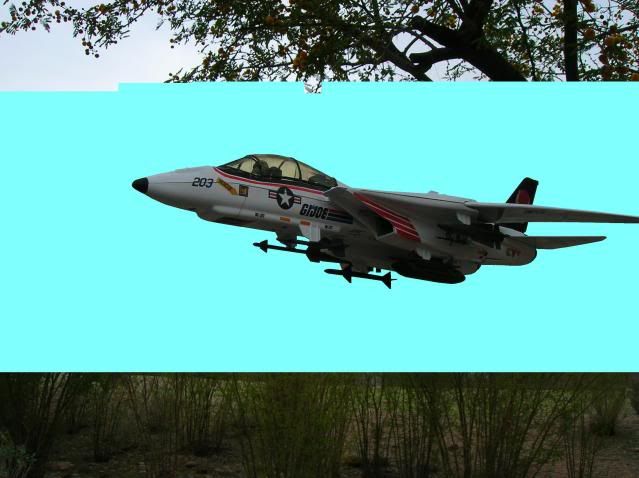 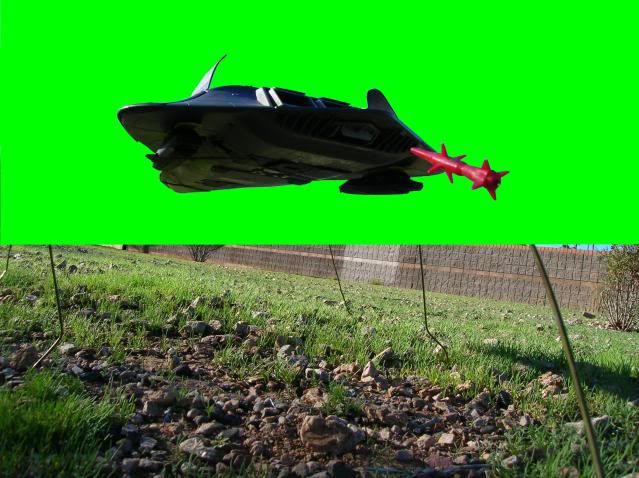 Now that you've got your plane cut out form the picture, you need to add a back ground to it. Here's where I've seen a lot of good pictures either go great or go bad. Take the time to go to Google or other search engines and look for back grounds of the sky, of mountains, of the ocean, of any and every landscape. Try to find some with differing light conditions, different times of day for different shadow angles. Choose some looking up into the sky from the ground, some looking down from the sky to the ground. I have a whole library of back ground images. Find what ever background you're looking for. Try to find one of a sufficient pixel size as well; the larger the better, that way your picture will look better.
__________________
The United States will conquer Terrorism with the help of God and a few Marines. Some people, when trying to avoid thinking about those things that cause them pain, turn to drink, or perhaps food, or drugs... I turn not to any of those... I collect action figures, turning my mind to the hunt, so that I might find a mote of peace... Over the years, I've found that alcoholism is much more socially acceptable by far. Last edited by Otto the Otter : 10-28-2010 at 03:51 AM. |
|
|
|
10-28-2010, 03:41 AM
|
#4 |
|
"Toot" Spelled inside out
Offline Posts: 2,297
-->
Join Date: Oct 2009
|
The reason I said to take pictures of your plane at different angles and in different lighting conditions is so that when you find these back ground pictures, you can match the shadows and lighting conditions better. Once you find a good back ground that matches your plane, go ahead and paste that sucker on there. Adjust the size of the plane so it looks good within the picture. Here's a couple of Rattlers were taken at as the sun was going down, so the lighting was perfct for this background.
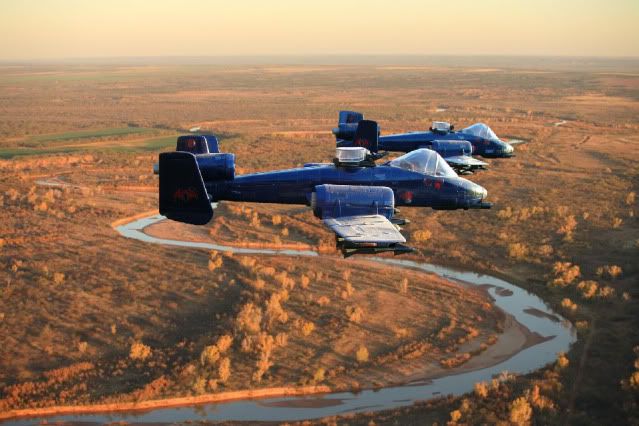 Something else to keep in mind when matching planes to back grounds is relativity. How does your plane sit relative to the back ground? Does it look natural or does it seem a bit off kilter. Planes move in three directions so if it's a bit crooked, it could look as if it's banking or something but does it have a weird angle to it that doesn't look right? This Night attack chopper looks OK here, but then again, it looks a little off because the angles don't match quite right 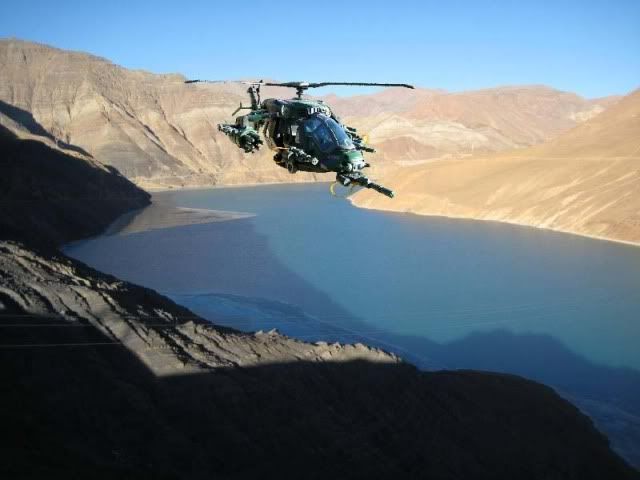 Here's a neat trick if you want more than one plane in the shot. First we have the Skystrikers again. This picture is done easily enough. I simply pasted the same picture of the plane twice, just making the background one smaller to make it look as if it's in the distance. Using the same plane twice also ensured that the lighting was the same on both planes, as well as their angle. 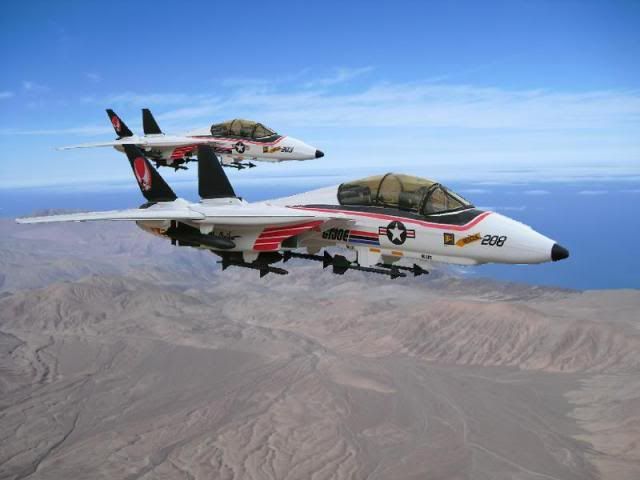 Now this shot has the Night Raven and a Conquest X-30 trailing it. That Conquest is actually right behind the Raven as the photo depicts, there is no cut and paste editing there. This simple trick was done by setting the planes on the ground in this position and cutting away the ground and their landing gear. Doing it this way again makes the lighting the same and the perspective the same. Nothing like having two planes that are supposed to be flying together have two different light sources and flight angles. 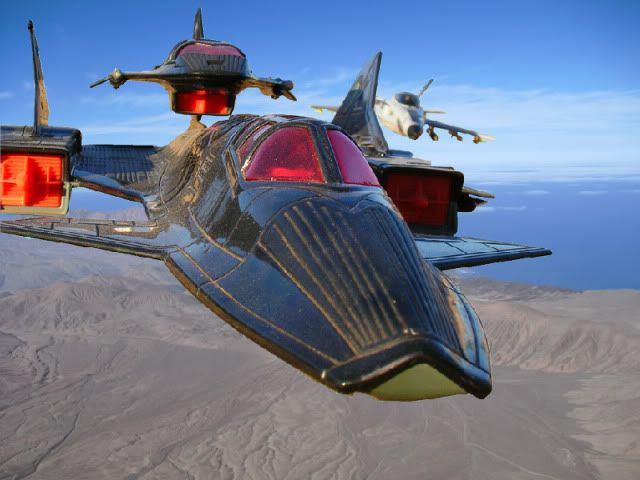 Notice, too, that between both pictures, I used the same background. Superimposing is all about the angle, blending in seamlessly, light sources and finding the right back ground. As far as special effects are concerned, I haven't quite mastered those yet, but if you play around with your photo editing programs, you can make the flames coming from the back end of a jet engine or missile or you can add some blur to a rotor blade if you don't like the way the real thing came out or you couldn't get the rotors to spin. I hope you found this tutorial helpful and if you guys have any questions, please feel free to shoot me a PM.
__________________
The United States will conquer Terrorism with the help of God and a few Marines. Some people, when trying to avoid thinking about those things that cause them pain, turn to drink, or perhaps food, or drugs... I turn not to any of those... I collect action figures, turning my mind to the hunt, so that I might find a mote of peace... Over the years, I've found that alcoholism is much more socially acceptable by far. Last edited by Otto the Otter : 10-28-2010 at 04:03 AM. |
|
|
|
10-28-2010, 04:00 AM
|
#5 |
|
"Toot" Spelled inside out
Offline Posts: 2,297
-->
Join Date: Oct 2009
|
  The effect on Serpentor's cape was achieved by sticking one of thsoe pain in the butt twist ties that hold vehicles into their pacakges into the back of his "skirt" an sticking it straight out. I formed a loop in the end so is held the cape in a more spread out look. 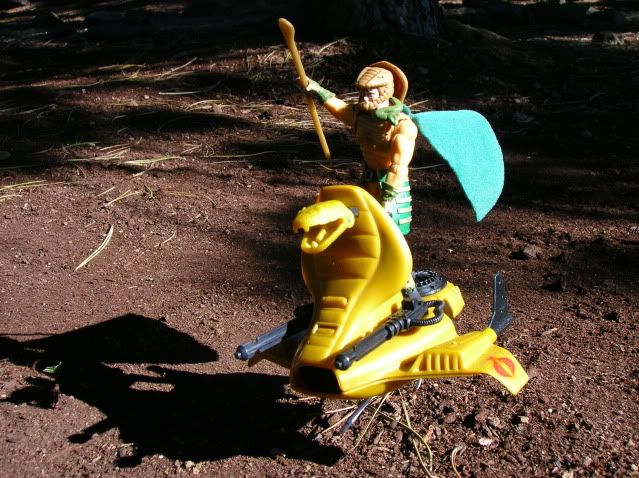 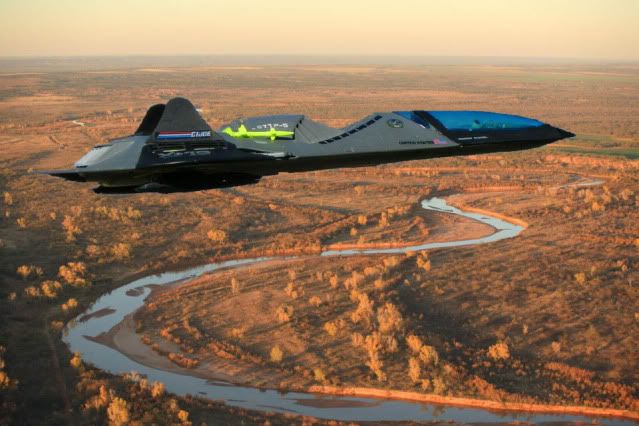
__________________
The United States will conquer Terrorism with the help of God and a few Marines. Some people, when trying to avoid thinking about those things that cause them pain, turn to drink, or perhaps food, or drugs... I turn not to any of those... I collect action figures, turning my mind to the hunt, so that I might find a mote of peace... Over the years, I've found that alcoholism is much more socially acceptable by far. |
|
|
|
10-28-2010, 11:05 AM
|
#6 |
|
Veteran

Offline Posts: 651
-->
Join Date: Jun 2007
|
Cool stuff. Classic techniques.
The only problem I always have with this kind of thing, is that all my helicopters have dreadfully droopy rotors. Don't you have that ? I suppose it should be possible to put a piece of wire underneath them to have them angle up, as if carrying the weight of the chopper in flight, but I've never tried that. Has anyone ? |
|
|
 |
«
Previous Thread
|
Next Thread
»
| Thread Tools | |
| Display Modes | |

 Hybrid Mode
|
|

Powered by: vBulletin Version 3.0.6
Copyright ©2000 - 2025, Jelsoft Enterprises Ltd.
Style Design By: vBStyles.com
Copyright ©2000 - 2025, Jelsoft Enterprises Ltd.
Style Design By: vBStyles.com