|
||||||||||||||||||
Simple brick or block wall |

|
|
|
#1 |
|
To old to play with toys!
Offline Posts: 5,962
 -->
-->
Join Date: Oct 2007
|
This is a how-to on building a simple but effective block or brick wall as seen HERE.
I am going to build a small sample wall here for reference, the one I used in my picture is 16" wide & 12" tall. The wall is simply foam core, I use the black type because it takes paint better than the white. It is easy to find, available at WalMart. The first thing you want to do is sand the side you are going to be working on. This will give you a little texture to your blocks. 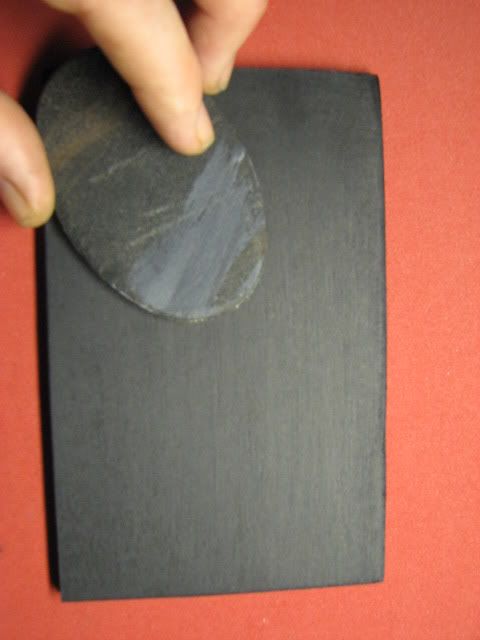 Next we are going to draw out our blocks. I know some of you are artist and can do this freehand, I am not, so I use a pencil & a ruler. First the rows:  I am going to make 1" x 1/2" blocks, so the rows are marked every 1/2" down the foam core. I then mark each block at 1" intervals across alternating every other row by 1/2" to offset your blocks 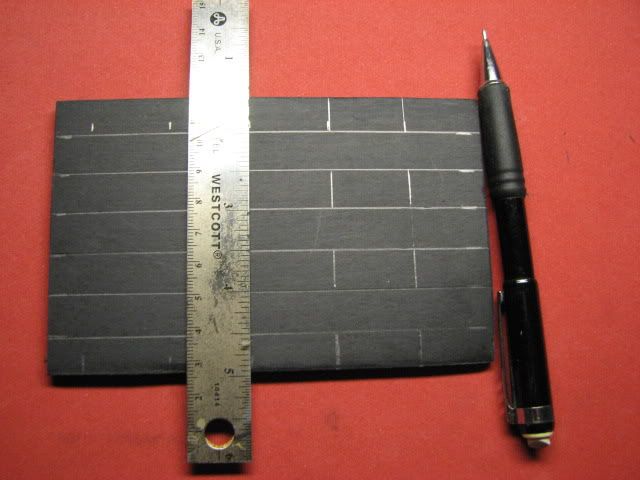 Every other row offset by 1/2 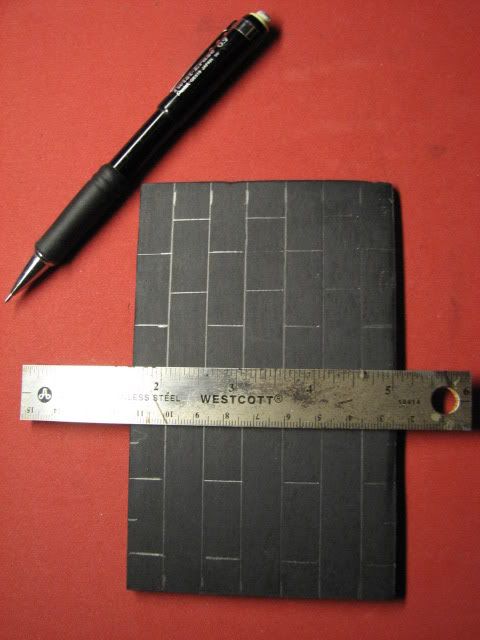
__________________
 "It ain't about how hard you hit, but how hard you can get hit, how much you can take and keep moving forward - thats how winning is done!" Rocky Balboa
|

|

|
|
|
#2 |
|
To old to play with toys!
Offline Posts: 5,962
 -->
-->
Join Date: Oct 2007
|
After you have your blocks drawn out, its time to emboss the blocks into the foam core. I used a wooden stylus, it is for sculpting with clay, I think I got it at Michaels. Any tool with a blunt tip will work.
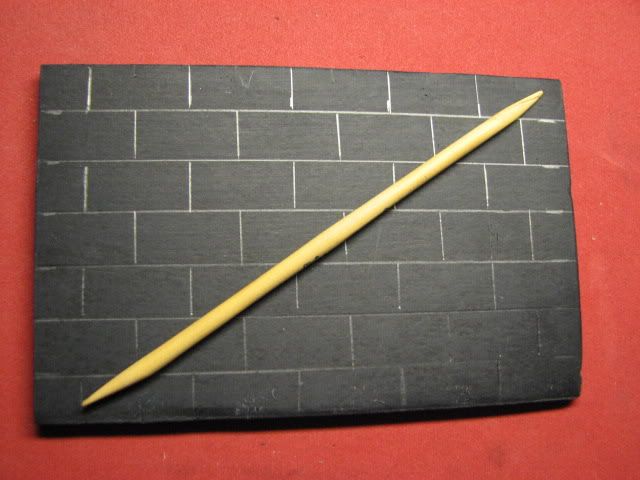 You don't want the tool to be sharp because you do not want to puncture the outer paper of the foam core (notice I did in the bottom left corner below). A ball point pen will work well too. Take your stylus and rub back and forth over your lines to make a indentation in the paper of the foam core. Make it as deep as you can without puncturing the paper. 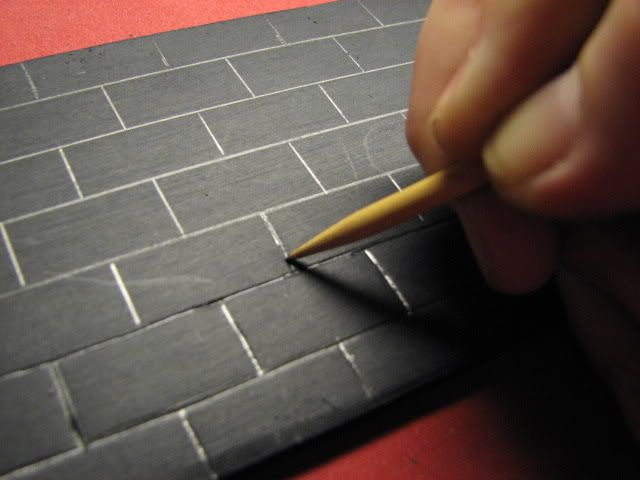 Then round all the corners of your bricks 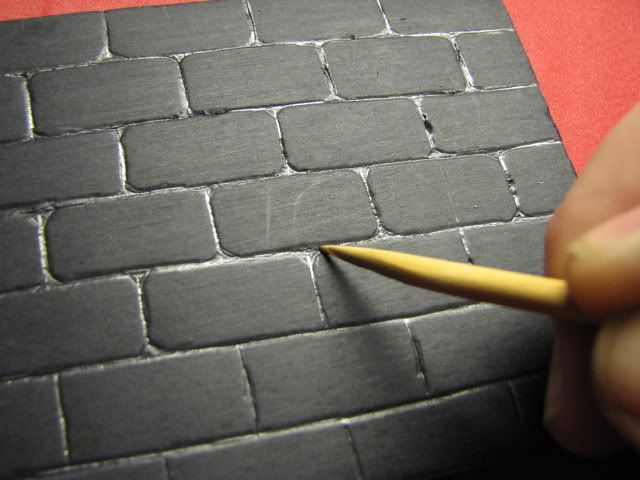 Add some character - put as much or as little detail into it as you like. 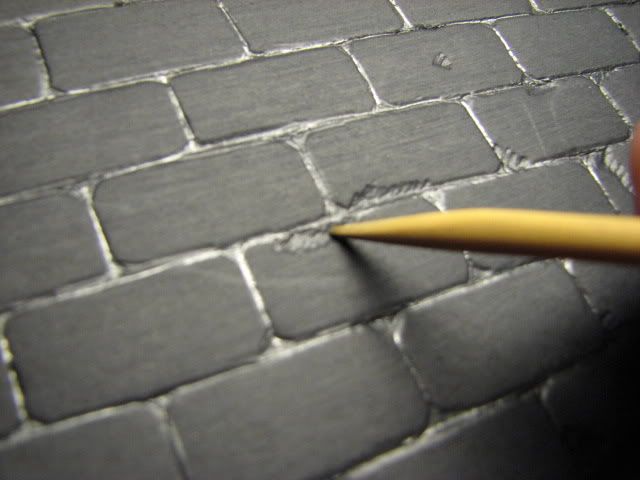
__________________
 "It ain't about how hard you hit, but how hard you can get hit, how much you can take and keep moving forward - thats how winning is done!" Rocky Balboa
Last edited by vader9900 : 12-13-2008 at 08:53 AM. |

|

|
|
|
#3 |
|
To old to play with toys!
Offline Posts: 5,962
 -->
-->
Join Date: Oct 2007
|
Time to paint. First coat will be a heavy drybrush. I use all Testors acrylic paints. The base is Battle Ship Grey, but any dark grey will work.
 Foam core will warp when it gets wet and allowed to air dry, acrylic paints are water based. I use a heat gun (a hair dryer will work too). It speeds up the drying time & it prevents warping. Next layer is a heavy black wash (25% black paint to 75% water) 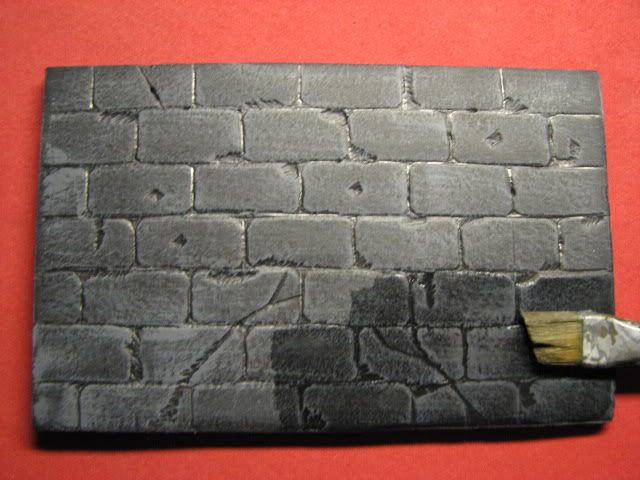 Make sure your wash gets down in your embossed cracks & crevases. Again use your heat gun. Make sure the wash is completely dry before proceeding. Then a light drybrush of olive drab. 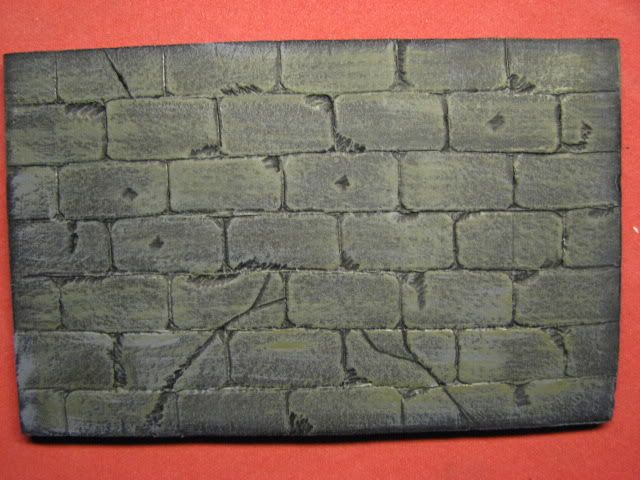 Then a very light drybrush of light grey 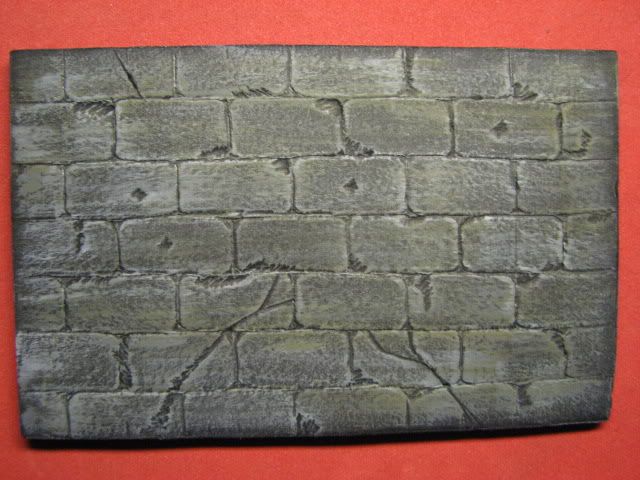 Thin out your black wash by 50% and give it another light coat, there again getting it in all the cracks. I sprayed mine down with Testors Dull Coat to seal the paint and to minimize reflection. Add figures & photograph!  Hope this helps! It actually took more time to write up this how-to than it did to make the wall. Dave
__________________
 "It ain't about how hard you hit, but how hard you can get hit, how much you can take and keep moving forward - thats how winning is done!" Rocky Balboa
Last edited by vader9900 : 12-13-2008 at 08:47 AM. |

|

|
|
|
#4 |
|
The Man Behind the Camera
Offline Posts: 632
 -->
-->
Join Date: Aug 2005
|
That is very cool and simple to do. Thanks for the "How to". That looks great. To think how much I spent on some coble stone and other bricks that looked no where near as good as this...
|

|

|
|
|
#5 |
|
Veteran
Offline Posts: 8,288
 -->
-->
Join Date: Feb 2008
|
That is very effective yet simple. Thanks
|

|

|
|
|
#6 |
|
ARAH for O-ringers
Offline Posts: 6,074
 -->
-->
Join Date: Dec 2007
|
You're an artist. PERIOD.
|

|

|
|
|
#7 |
|
Veteran
Offline Posts: 665
 -->
-->
Join Date: Aug 2008
|
Great work!!Well worth the time to get an awesome result as yours!!
__________________
"If it doesnt have a fire coming out the ass end, it isnt worth flying" |

|

|
|
|
#8 |
|
Veteran
Offline Posts: 169
 -->
-->
Join Date: Aug 2008
|
Thanks for the great instructions. I'm definitely going to have to try this!
|

|

|
|
|
#9 |
|
THEY ARE NOT DOLLS!!!
Offline Posts: 16,465
 -->
-->
Join Date: Jun 2007
|
thanks Dave

__________________
MY FLICKR PAGE...... |

|

|
|
|
#10 |
|
OUTRIDER,Always Remember.
Offline Posts: 590
 -->
-->
Join Date: May 2008
|
Thank's for another great "How To",i'll be giving this a try.I've already tried out your Tree Building & Bush Building How To's,and with your help I think my Tree's came out great.I'm also building a Home Made Lighting Box from seeing the one you have,and when I get it finished i'm going to start posting Pic's.So Thank's for the Help...
|

|
 |
«
Previous Thread
|
Next Thread
»
| Thread Tools | |
| Display Modes | |
|
|
Powered by: vBulletin Version 3.0.6
Copyright ©2000 - 2024, Jelsoft Enterprises Ltd.
Style Design By: vBStyles.com
Copyright ©2000 - 2024, Jelsoft Enterprises Ltd.
Style Design By: vBStyles.com





 Linear Mode

