|
||||||||||||||||||
|
|
Modular Diorama Set |

|
|
|
#1 |
|
To old to play with toys!
Offline Posts: 5,962
 -->
-->
Join Date: Oct 2007
|
This is a how-to on building a modular set that can be configured in any way you can imagine. You can make Jungle, Swamp or Snow scenes with just a few items and they can be placed in different spots for a fresh scene every time. I build all of my indoor sets inside my light box, for info on that LOOK HERE. First I will explain how I build my trees:
 These are so simple to make. Sorry I do not have time to actually sit down and make one right now, but I will try to explain it the best I can. I use PVC pipe as the frame. It is light weight and very strong. Don't use things like paper towel tubes because they are to weak. Decide what size tree you want for your diameter, I use between 1" to 1 3/4" and cut it to 10" tall. Hot glue the PVC to a piece of 1/8" plywood or similar for your base. For my fallen tree I ripped the botton quarter off with a saw & hot glued it to plywood as well. I use super sculpy for the bark. Start at the top of the tree and apply thin layers and smooth it onto the PVC as you go. Once you have the entire PVC covered with a thin layer, start sculpting in the bark. I use a wood sculpting tool, but a nail or Xacto knife will work as well. Start at the top and just start running lines down from top to bottom. There is no right or wrong way, just make random grooves in the sculpy. Now you need to cure your first layer, I use a heat gun, it can also be baked. A heat gun will let you cure the entire tree in about 2 minutes, plus you can turn the tree in your hand and rub off any burrs as it cures. Let it cool down before adding your second coat. Add more sculpy to any thin spots or any places that cracked while curing. Re-sculpt the new bark as above & heat it again. You want your base to be thicker than the top, so smoothe in a bunch of scupy around the base of the tree. Smooth it real well onto your wood base & onto the tree itself. Sculpt the trunk just like the rest & cure it. Now its time to paint. Use cheap WalMart craft paints, they work perfectly. Paint the entire tree brown or red for redwoods. 2 coats should do it, make sure you get down in all the crevases. I then use a blackwash of 25% black paint to 75% water and make sure it gets down in there real good, this will give you your shadow look. I use the heat gun to dry the blackwash fast so it will not run. Last step is to dry brush the bark. Tans and greys work very well, depending on what type of tree you want. If you have any questions feel free to PM me. To be continued......................................... .................
__________________
 "It ain't about how hard you hit, but how hard you can get hit, how much you can take and keep moving forward - thats how winning is done!" Rocky Balboa
Last edited by vader9900 : 06-26-2008 at 12:01 AM. |

|

|
|
|
#2 |
|
To old to play with toys!
Offline Posts: 5,962
 -->
-->
Join Date: Oct 2007
|
Now that we have trees made, its time to build a set.
I use Woodland Scenics stuff alot. It is for use with model trains and can be found in most hobby stores. All of my turf & grasses are made by them. 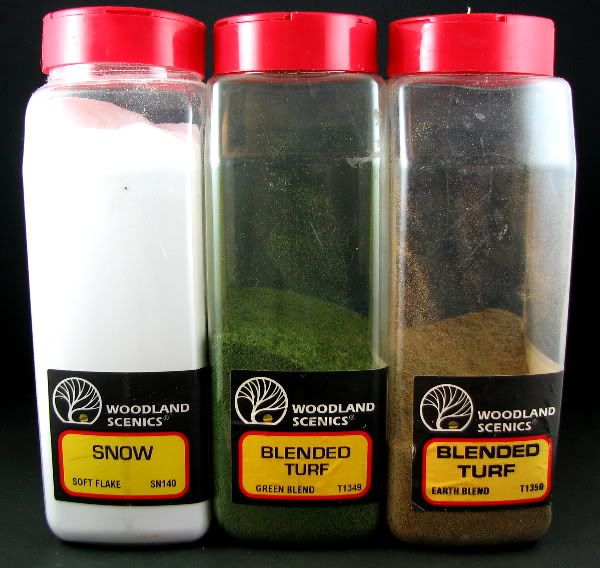 Inside my lightbox I use a piece of foamcore as a floor (black for jungle, white for snow). I always build my sets with my camera on so I can see what it looks like as I build it. First I will set up the trees to the desired spot: 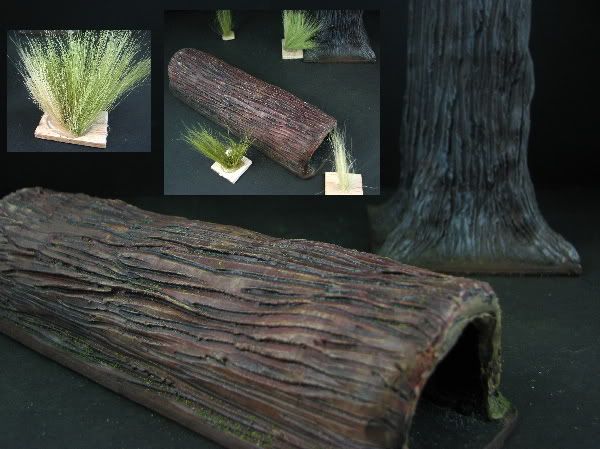 I want my tall grass to be modular as well so I hot glue various lengths and colors to craft wood for a base (see insert above). Looking throught the camera I add the tall grass to the desired spot. Now add the cover grass: 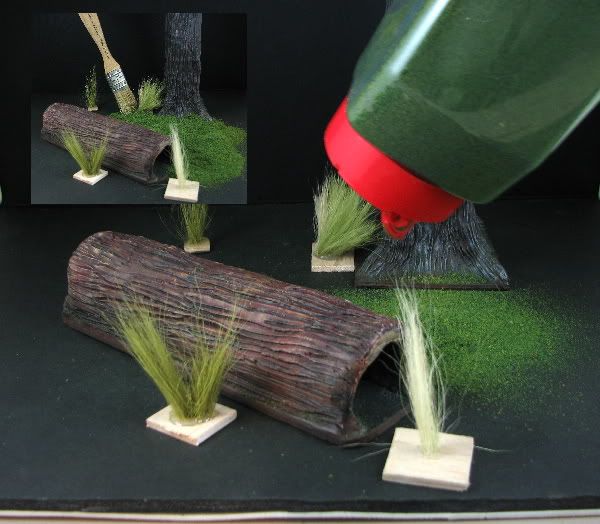 This is a lush forrest or jungle so I use the dark green turf. I use a paint brush to level it out and make sure it covers all of my bases. Watch for bald spots through you camera. Coming up next - Final touches.......................................
__________________
 "It ain't about how hard you hit, but how hard you can get hit, how much you can take and keep moving forward - thats how winning is done!" Rocky Balboa
|

|

|
|
|
#3 |
|
To old to play with toys!
Offline Posts: 5,962
 -->
-->
Join Date: Oct 2007
|
Now lets add in the little extras:
 I added wood chips to the top of the log & moss to the front of it. Some cheap WalMart foliage is added in the far back. Now for the real fun part, the whole reason we do all this crazyness to start with - add & pose your GI Joe figure or figures: 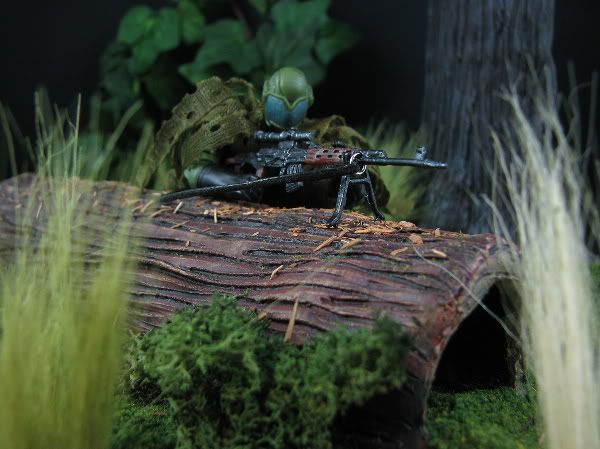 The same "set" only with snow:  Here we use snow instead of turf & only "dead" tall grass because it is winter. Of course make sure your focus is on your figure  oops! oops!Thanks for looking, hope some little part of all this can help someone.  Dave Dave
__________________
 "It ain't about how hard you hit, but how hard you can get hit, how much you can take and keep moving forward - thats how winning is done!" Rocky Balboa
|

|

|
|
|
#4 |
|
G.I. Smurf
Offline Posts: 3,446
 -->
-->
Join Date: Jan 2006
|
man, this one is really great. the snow picture is my favorite.
|

|

|
|
|
#5 |
|
Veteran
Offline Posts: 447
 -->
-->
Join Date: Jun 2008
|
wow,this is major help! Thanks Dave!
__________________
[ |

|

|
|
|
#6 |
|
Smack-Talking Ninja
Offline Posts: 581
 -->
-->
Join Date: Jan 2008
|
Thanks, this write-up made me lick my elbows.
I had no end of problems with the paper tubes as the base to the trees... never would have thought PVC. Nice. I like the fact that you are using set pieces, whereas you change them up frequently for different photos. I may try something in this manner - although everything I've created has been nailed or glued down since my kids are actively playing with them ;-) May I ask what you (and others I've seen on this site) use for that water texture? I would guess it's some kind of tempered glass surface, like the stuff used for outdoor patio furnature tables? Very cool. Thanks for sharing. Cheers! ~ Paul. |

|
 |
«
Previous Thread
|
Next Thread
»
| Thread Tools | |
| Display Modes | |
|
|
Powered by: vBulletin Version 3.0.6
Copyright ©2000 - 2024, Jelsoft Enterprises Ltd.
Style Design By: vBStyles.com
Copyright ©2000 - 2024, Jelsoft Enterprises Ltd.
Style Design By: vBStyles.com






 Hybrid Mode
