|
||||||||||||||||||
Humvee Project - How to/turtorial |

|
|
|
#1 |
|
Resolute fanboi
Offline Posts: 4,184
 -->
-->
Join Date: Jan 2008
|
Bought this sucker from ebay to make it into one of my small projects (I have many now
 ) )Well the first thing I had to do was get the stickers off (since it was used). This was simple, I just used my nails and peeled them off. After taking off everything that should come off, I ended up with the start of the Humvee that looked like this: 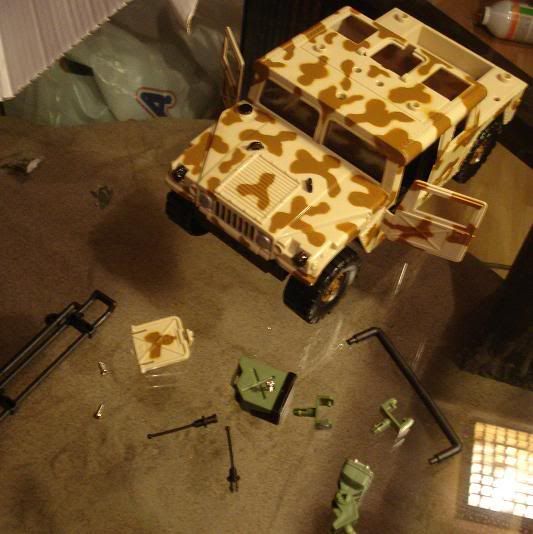 Next step was taping over the "glass" - I didn't have any masking tape which I would have preferred, but black electrical tape does the trick just as well if you are carefull. 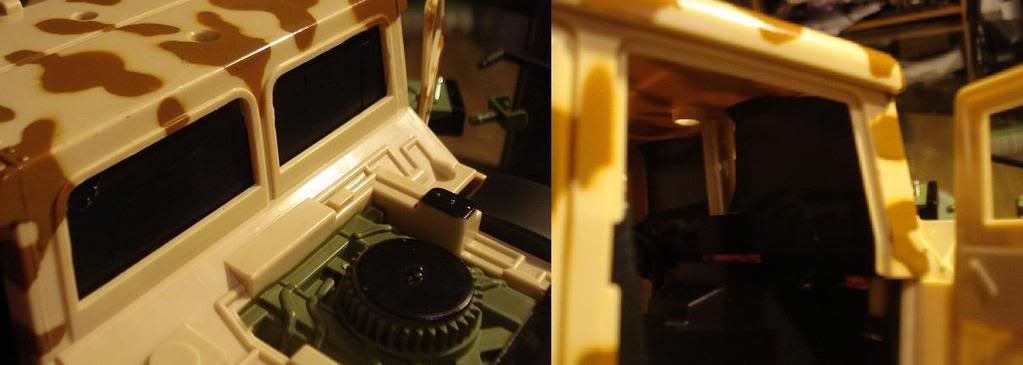 After that was done a base coat/undercoat was applied - I wanted a "special forces" look, so I went for a black Humvee. 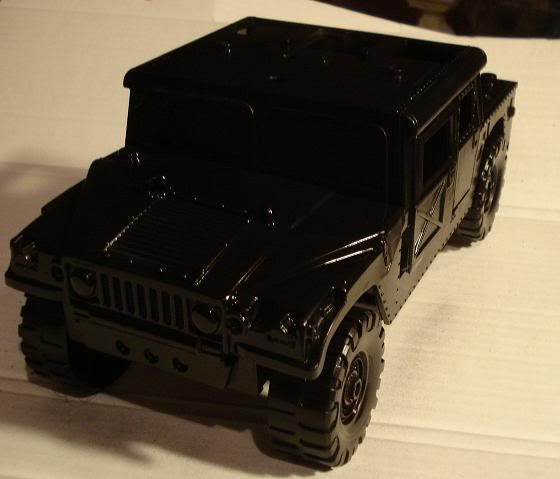 Now then, I wanted the Humvee to look used - so out come the brushes and paint. First stop was weathering the undercarriage and wheels. 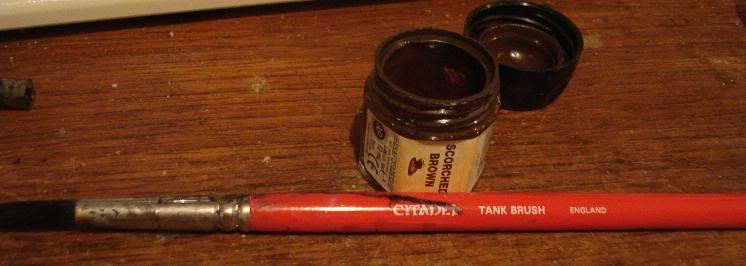 I here first applied a watery (about 70% water 30% paint) cover and tried to stipple, stripe where water/mud etc would normally be carried off from the wheels. Before it dried completely I dabbed some toilet paper over it, taking most of it away but leaving a small sheen of color/water, which I would use as my base for the weathering. Next was the actual weathering, add dark brown paint, almost to the edges of the dabbed base. But I let a small edge of it show, as it gives the effect of dried mud/water. 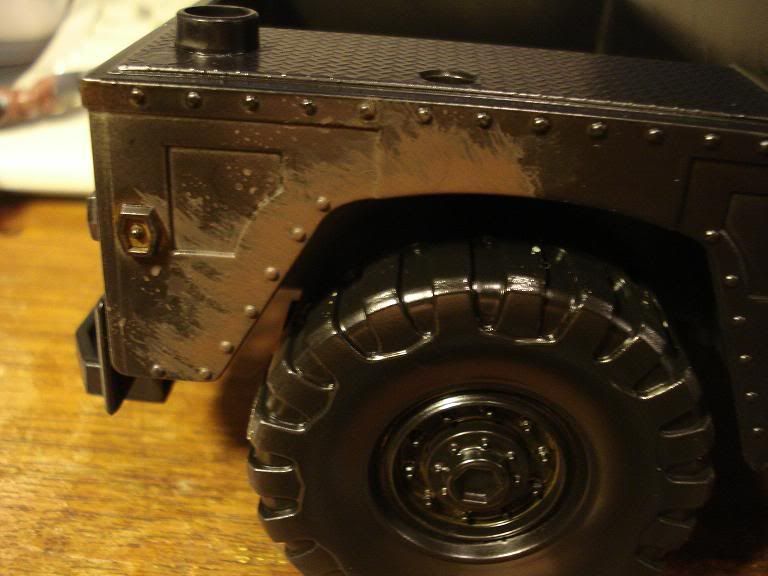 Step after this was adding a stronger brown color closer to the edge - again this gives the effect that it is drying mud and that the closest to the tires are the most recent mud. On this project I used a reference picture from Battlefield Bad Company to look where mud would be applied. Even if you have a good idea of how you want it to be, or how you think it should be, having some sort of reference picture is always a neat idea and might be an eye opener at some point during such a project. 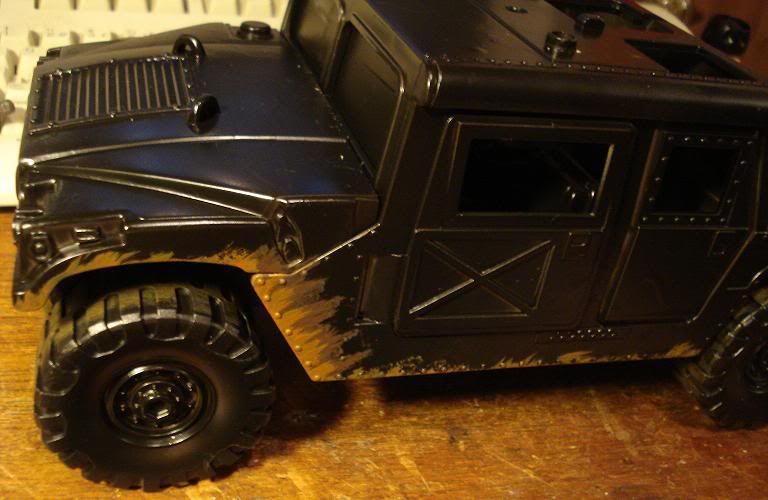
__________________
Arguing on the internet is like competing in the special Olympics - You may win, but you are still retarded |

|
Humvee Project continued |

|
|
|
#2 |
|
Resolute fanboi
Offline Posts: 4,184
 -->
-->
Join Date: Jan 2008
|
Next after this was dry brushing metal on the edges of any surface. This gives it a worn look, this baby has seen action! been abused and used to the fullest.
I didn't add any battle damage (yet), but more on that in some later postings 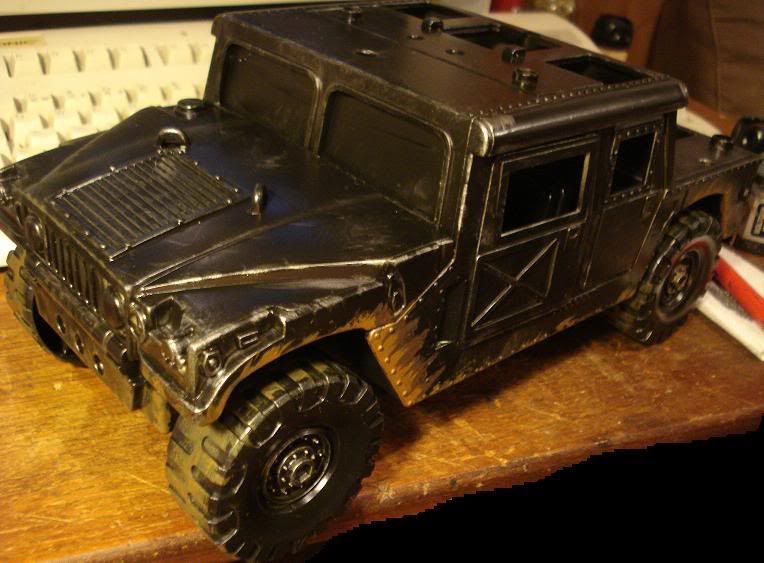 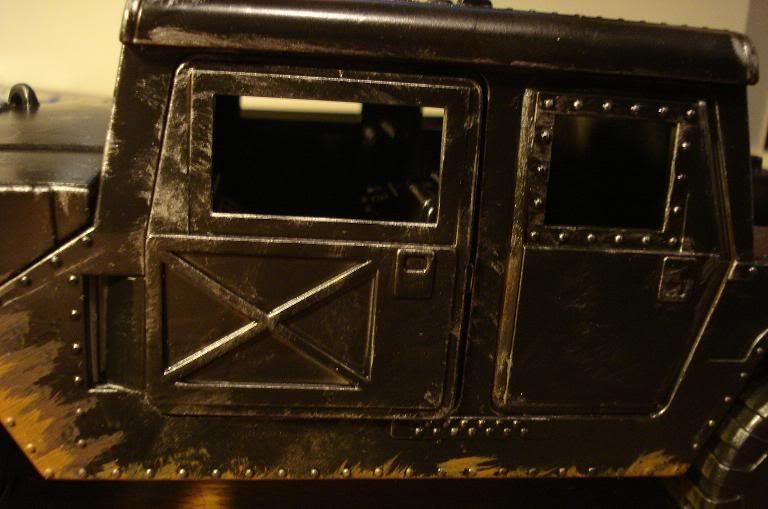 The Humvee is about 80% finished, I still have lots of small details to add, and some stuff to fix. Not least of all the pintle-mounted 50.cals (or m249's I haven't decided yet ...) But its good enough to take pictures of now  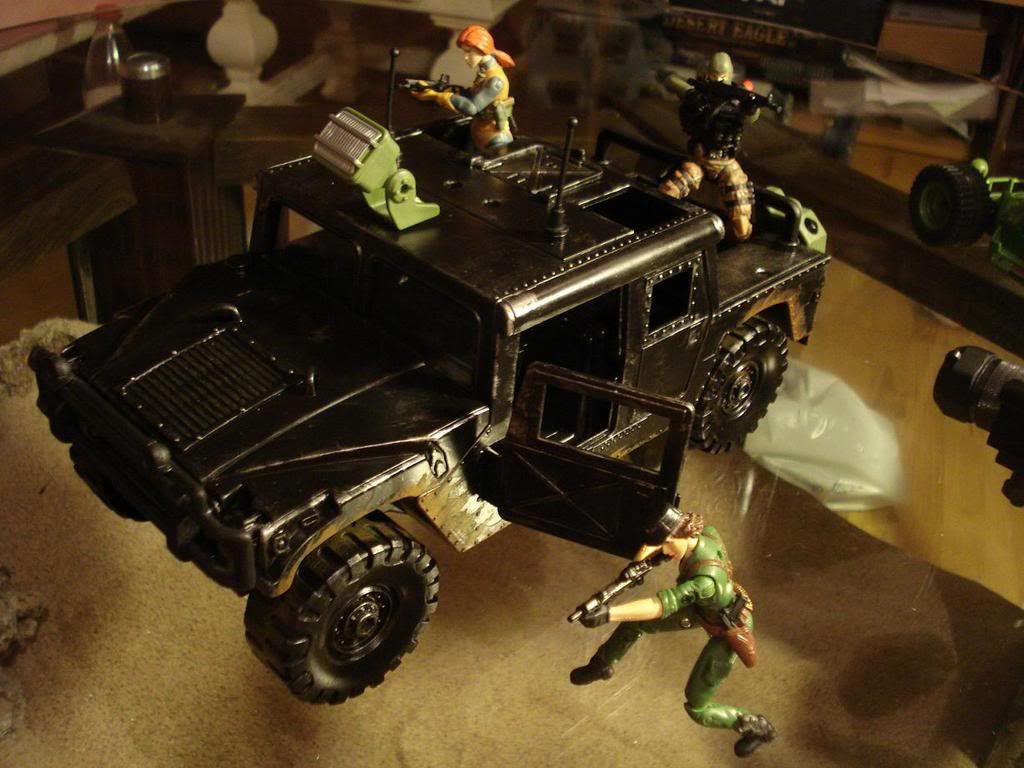 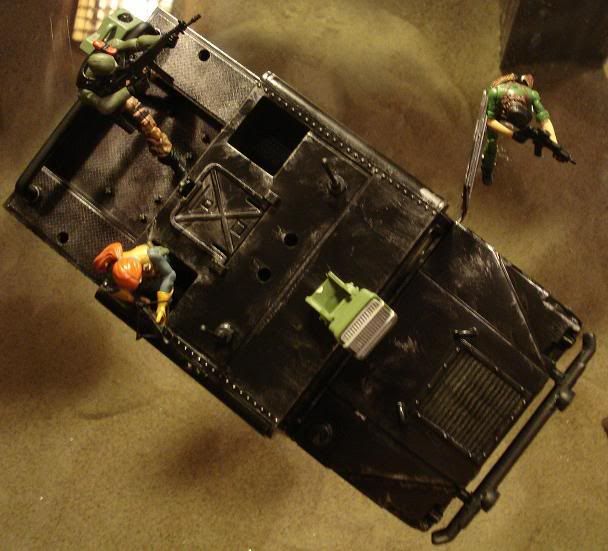 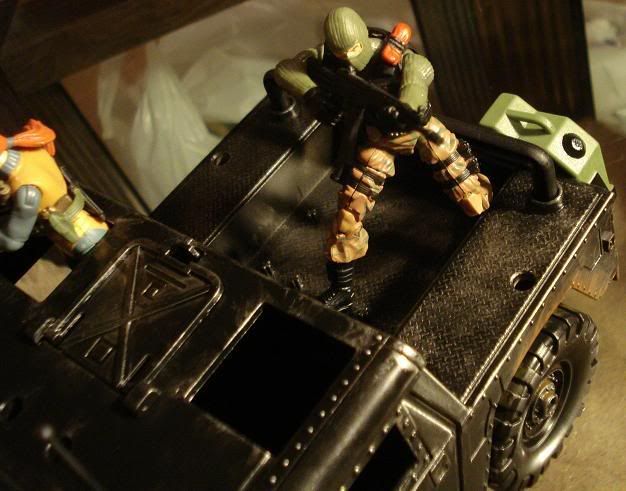 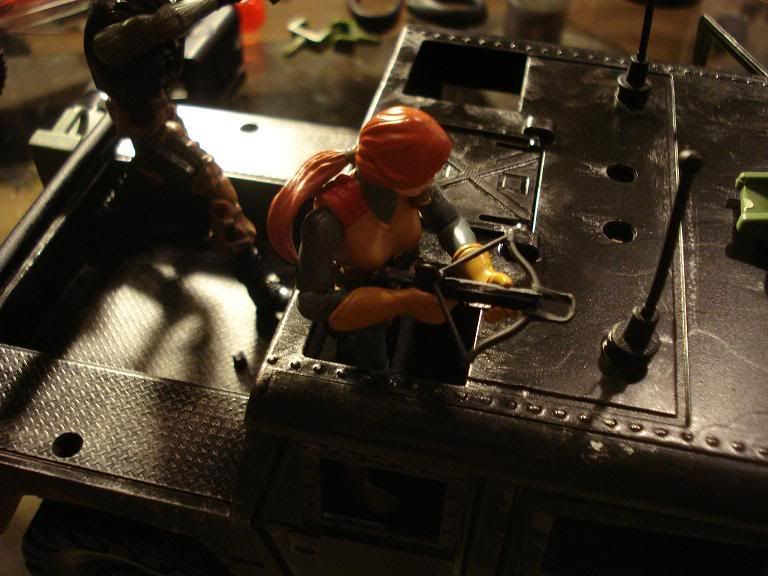
__________________
Arguing on the internet is like competing in the special Olympics - You may win, but you are still retarded |

|
Thank You! |

|
|
|
#3 |
|
Smack-Talking Ninja
Offline Posts: 581
 -->
-->
Join Date: Jan 2008
|
Haradrel, thanks for posting this... the step-by-step pics make it easy to follow. I will be trying this shortly.
Appreciated your write-up. The final product looks totally sick. Cheers! ~ Paul. |

|

|
|
|
#4 |
|
Resolute fanboi
Offline Posts: 4,184
 -->
-->
Join Date: Jan 2008
|
No problem mate
 I plan on doing more of these how-to's/tutorials, I just need to find the time to sit myself down and paint/make stuff. Keep in mind that the Humvee is only about 70% finished, there is still a lot of work to do! (which I will take pictures off). I noticed that the lighter brown in the pictures appear way to warm, its not like that in real life. I'll try to get a few photos of it outside today in natural daylight to show you what I mean. (and if that doesn't work I'll do a 50/50 mix of the dark brown with the light brown and paint over it, only leaving the lightest brown at the further most edges (highlighting).
__________________
Arguing on the internet is like competing in the special Olympics - You may win, but you are still retarded |

|

|
|
|
#5 |
|
Resolute fanboi
Offline Posts: 4,184
 -->
-->
Join Date: Jan 2008
|
Progress report:
Well the painting hasn't gone any further yet, but I took a few snapshots outside in better light today (even though it was raining  ) )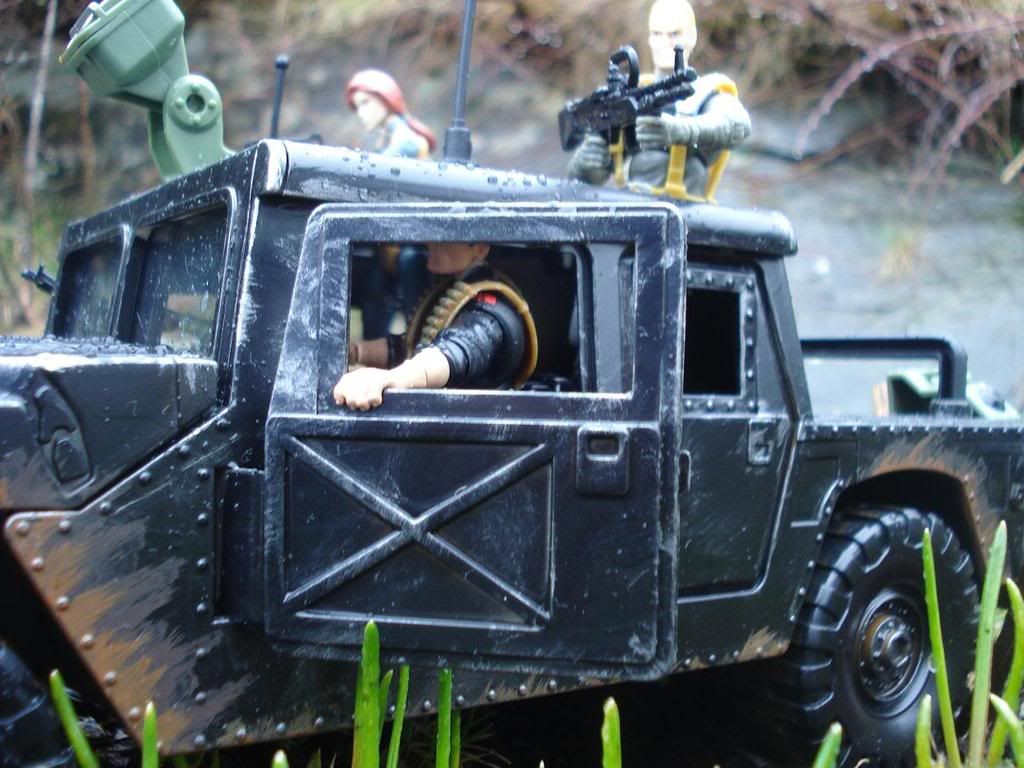 Here you can see how the dry brushing really paid off on the rivets and bolts, as well as the edges. 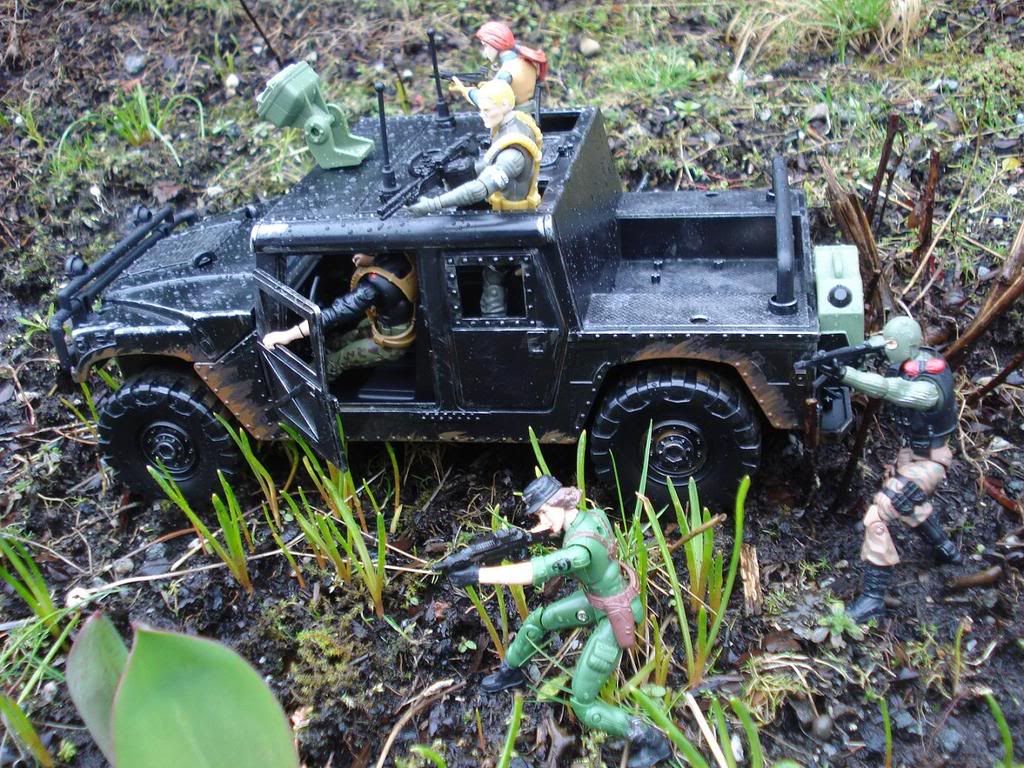 A side view of the action - notice the mud is a tad light (so I might darken that down a bit) and the last picture
__________________
Arguing on the internet is like competing in the special Olympics - You may win, but you are still retarded |

|

|
|
|
#6 |
|
Senior Member
Offline Posts: 221
 -->
-->
Join Date: Feb 2008
|
cool! thanks for sharing.
|

|
 |
«
Previous Thread
|
Next Thread
»
| Thread Tools | |
| Display Modes | |
|
|
Powered by: vBulletin Version 3.0.6
Copyright ©2000 - 2024, Jelsoft Enterprises Ltd.
Style Design By: vBStyles.com
Copyright ©2000 - 2024, Jelsoft Enterprises Ltd.
Style Design By: vBStyles.com



 Linear Mode

