|
|
||||||||||||||||||


Creating a Pillbox/Fence Diorama, step-by-step |
 03-09-2008, 08:29 PM
|
#1 |
|
Smack-Talking Ninja
Offline Posts: 581
 -->
-->
Join Date: Jan 2008
|
Yo Homeboys (and Girls)...
Here is the fourth in a series of dioramas that I will share with you. As long as I have time and ideas (and encouragement ;-), I will keep going. Thanks to the others who have recently started their own how-to's on various things, very much appreciated from one hobbist to another. Thanks for all the PMs, email and kudos for the short film (found in dioramas as "Ambush @ Dawn"). It was fun to make and share with everyone. Incase you're late to the party, be sure to check out the previous 3 diorama how-to's I've created with my son. Looking back at the first project, I personally can see that we've come along way in skill and presentation, and after all, that's what it is all about. Growing and learning. The previous projects, best served with a glass of fresh cool milk: Building a Ranger-Shack (includes making a building inside and out, with brick and wood slats): http://www.joedios.com/forums/showthread.php?t=2086 Building a Rock Wall & Trees (includes working with casting plaster, painting, making huge trees and applying foilage): http://www.joedios.com/forums/showthread.php?t=2178 Building a Stone Based Diorama (includes working with clay to make stone bricks, and sculpting a large snake head): http://www.joedios.com/forums/showthread.php?t=2247 As in previous how-to's I'm attempting to show each step, such that you can either recreate yourself in your own image, or to inspire you to try something else to achieve the same result. Feel free to give some pointers, or just heckle me... whatever spins your turn-table. As before, I'm flying by the seat of my pants here. Now, onto some more project schweet action... |

|
Creating a Pillbox |
|
03-09-2008, 08:32 PM
|
#2 |
|
Smack-Talking Ninja
Offline Posts: 581
-->
Join Date: Jan 2008
|
We wanted to create a Machine-gunner's PillBox - for Cobra lackies to hide out in with a large gun. When we get the pillbox done, we'll have a chain-link fence beside it. Maybe the fence will be electrified, maybe it won't ~ I'm not sure at this point, we'll see.
Went on a shopping trip to Michael's Craft Store in Langley last weekend and picked up a wooden planter box for $1.99. As you can see from the following photos, it is slightly slanted which makes for a great base of a concrete pillbox. And further, it has those horizontal lines cut into it, which will add some needed perspective. Ok, so let's cut it up!  You will notice above, that I cut the bottom out of the planter box. All I actually had to do is use an xacto knife to cut the glue and then slam it with my fist to pop it out. Now, lacking any real tools like a jigsaw, I had to drill large holes around the shapes and then punch out the window. For the rear, I used a hacksaw to cut it out. Very rough and fuggly, but I wasn't worried, because I planned to use skinny-sticks to shore it all up around the open edges... see below:  Skinny Sticks Rejoice! As you can see from the above image, I used skinny sticks within the cutouts, as well as outside and inside. Now it looks very clean and promising. I would really encourage anyone who's doing a doorway or window to use skinny sticks in this manner, really adds to realism and cleans up your edges, thus giving your doorway/window depth. Just my two cents. Below, you will see the whole thing turned upside down. As the roof was knocked out, I used some small skinny-sticks to hold it in place when it's on... then we can take it off no prob as well to shine some light in for photos.  Glue is all dried... threw the roof on there. Cobra Commander approves thus far! He's a hard man to pleassssssse.  Now we're ready for painting. I'll post the results of the painting once it dries. And incase you're wondering - Everything you see thus far took just under 1 hour... that's it! Cheers! ~ Paul. Last edited by fifthconspiracy : 03-09-2008 at 08:40 PM. |
|
|
|
03-09-2008, 08:37 PM
|
#3 | |
|
Death from above!!
Offline Posts: 535
-->
Join Date: Sep 2005

|
Tha's pretty darn neat! Good work my good man! I'll have to try that out. Simple, yet extremely effective. Love what you've done thus far...better keep it up!
__________________
PORK CHOP SANDWICHES!!!!! Quote:

|
|
|
|
Ok, couldn't wait for it to dry |
|
03-09-2008, 09:06 PM
|
#4 |
|
Smack-Talking Ninja
Offline Posts: 581
-->
Join Date: Jan 2008
|
Ok, I couldn't wait for it to dry - had to show... I painted it outside with fleckstone paint and it looks balls-to-the-wall awesome! IMO ;-)
Here's a shot of it drying in the garage.  Cheers! ~ Paul. |
|
|
|
03-09-2008, 09:08 PM
|
#5 | |
|
Death from above!!
Offline Posts: 535
-->
Join Date: Sep 2005
|
FLECKSTONE! Woo!!!!!!!!!!!!!!!!!!!!!!!!
Looks great!
__________________
PORK CHOP SANDWICHES!!!!! Quote:
|
|
|
|
Dry to the bone - thoughts? |
|
03-11-2008, 08:54 PM
|
#6 |
|
Smack-Talking Ninja
Offline Posts: 581
-->
Join Date: Jan 2008
|
Ok, the fleckstone action is dry to the bone.
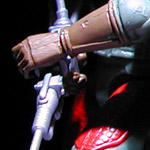
My thoughts - The texture is perfect. The fleckstone covered all the cracks and brought out the general shape of the window-slit quite nicely. The color - especially in photos - not so much. I think I'll paint it flat gray and then follow-up with some dry-brushing around the areas that water would spill down it in reality. Here's some photos to show the progress...  And further, here's a nice closeup of Destro looking out over the shores of Cobra Island...  Thoughts? Cheers! ~ Paul. |
|
|
|
03-11-2008, 09:08 PM
|
#7 |
|
aka 'Paul WS Anderson' ;)
Offline Posts: 7,751
-->
Join Date: Jul 2005

|
Frak, you are a building monster! I always wanted to do my own pillboxes!!!
|
|
|
|
03-11-2008, 09:08 PM
|
#8 | |
|
Death from above!!
Offline Posts: 535
-->
Join Date: Sep 2005
|
Pretty.
__________________
PORK CHOP SANDWICHES!!!!! Quote:
|
|
|
|
Rocking it Gently |
|
03-11-2008, 09:18 PM
|
#9 |
|
Smack-Talking Ninja
Offline Posts: 581
-->
Join Date: Jan 2008
|
Ok, so I decided to work on the base of the diorama and give it some shape.
Firstly, we wanted to have a 1.5" tall hill that the Pillbox would sit on, as a lookout over the shores of Cobra Island. Secondarily, we will have a gravel/dirt mix of ground texture going on here. The hill will look like a man-made manufactured and be gravel. The other cardboard strips on the floor are to raise up the gravel walkways that will exist on the "Cobra" side of the chain-link fence. There will be dirt pretty much everywhere else. And we also added a small indentation for a path down off the hill onto the lower ground below (see pic below). Here's some pics for your medulla oblongata's enjoyment:  You'll notice that we painted the pillbox flat gray and we think it looks much better. My son actually was the one who did the spray-painting ;-) We'll be dry-brushing it later on to get the "real" look. Comments Welcome! Cheers! ~ Paul. |
|
|
|
03-11-2008, 09:22 PM
|
#10 | |
|
Smack-Talking Ninja
Offline Posts: 581
-->
Join Date: Jan 2008
|
Quote:
I wasn't planning on doing Pillboxes, I was with my wife and kids at Michaels picking up some foilage for the stone-snake-head diorama and these wooden planter boxes just grabbed my eye. I turned one upside down and "SOLD".... it's actually working out quite nice, better than I initially expected. This diorama is twice as long (twice as nice) as the other 3 we've done. I don't have a table or shelf big enough to store this sucker once done ;-) I wanted the length to be able to pull off a nice chain-link fence. Cheers! ~ Paul. |
|
|
|
 |
«
Previous Thread
|
Next Thread
»
| Thread Tools | |
| Display Modes | |
 Linear Mode

|
|

Powered by: vBulletin Version 3.0.6
Copyright ©2000 - 2025, Jelsoft Enterprises Ltd.
Style Design By: vBStyles.com
Copyright ©2000 - 2025, Jelsoft Enterprises Ltd.
Style Design By: vBStyles.com