Creating a Custom Assault Pick-Up
Whenever you look at the news or a video game, if its Iraq or Afghan, there is always footage of civilian pickup trucks being outfitted with weapons and used by attackers.
I thought, well there has got to be times when an area under the Cobra regime, either does not have the budget or the supply lines to keep a steady flow of Cobra issue vehicles coming threw. So at some point they would do the same thing. Take control of a pickup truck and retro fit it to serve them. Thus this project. Since how-to's are all the rage and everyone is building awesome sets, I thought I would do a step-by-step on how I make a vehicle. The Before Pic - I picked this Lanyard truck up on ebay for 2.25, a perfect canidate. 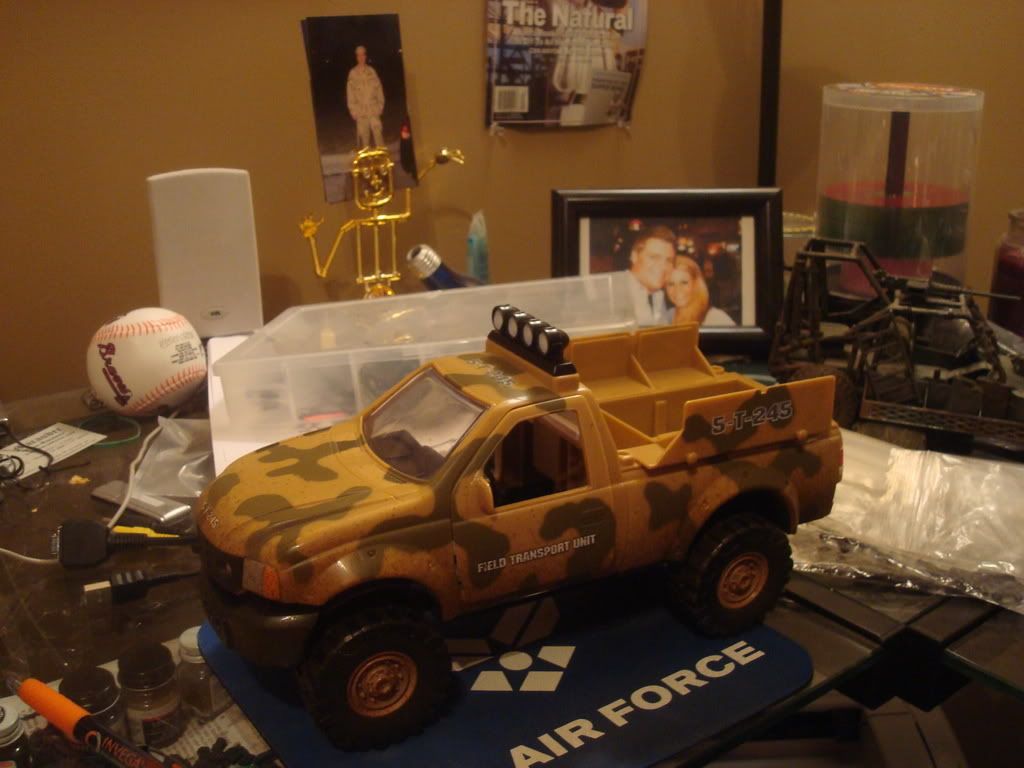 |
Paint it
First thing is first, take the thing apart. There was an unbeliavble amount of screws in this thing. But it was hella easy to get apart, and there were so many pieces it made it easy paint what you want without have to tape off other parts.
Here is the base coat 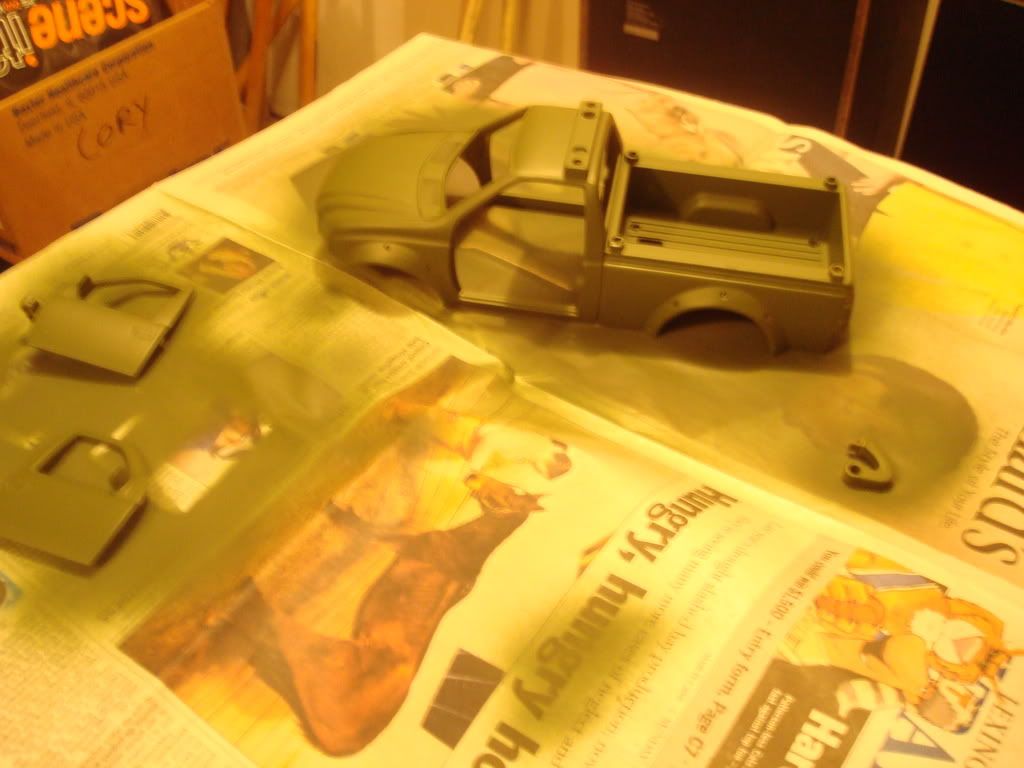 |
assemble
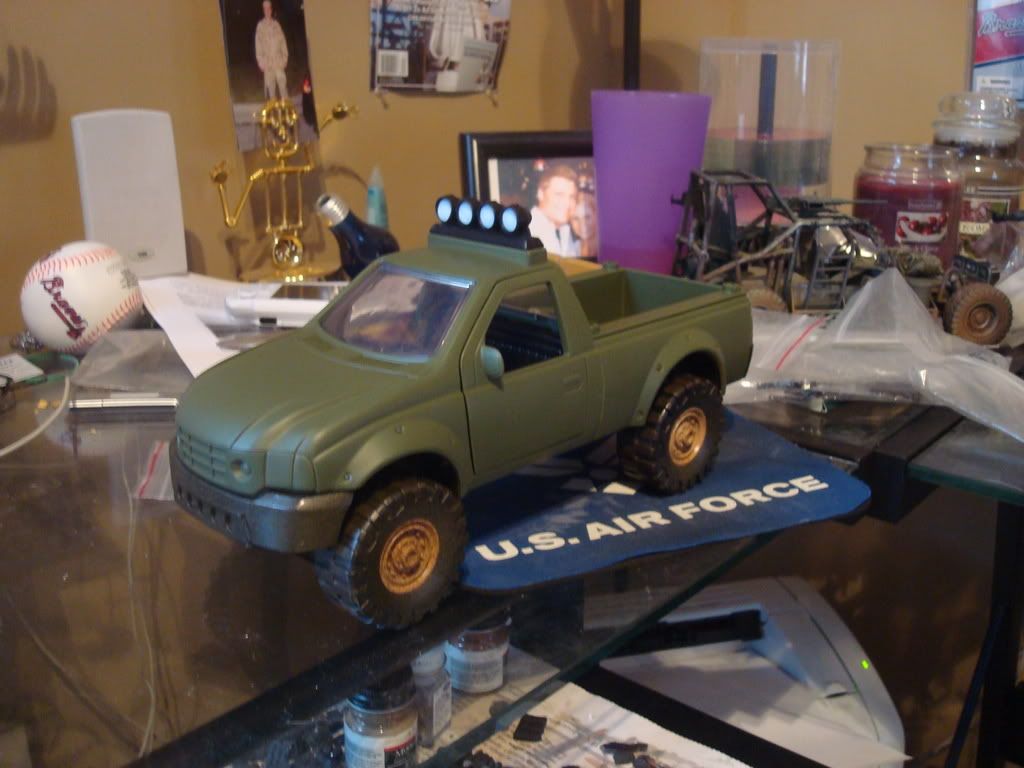
So now, I put the thing back together to see what I was working with....
 |
hmm
not to shabby, before we go ahead with the heavy fabrication, I thought I might go ahead and paint the stuff I know at this point I want painted. basically, head lights, taillights, wheels and shades in the grill.
 |
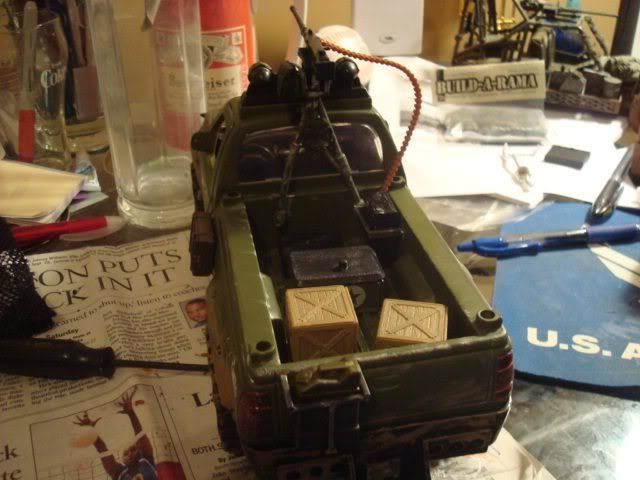
firepower
One thing all these trucks have is a big ass gun in the bed, so thats where I started. I settled on using a 50. cal from the night ops hummer as the fire power. I used the bracket from an old joe morter defense system playset, worked out good. By drilling a couple light circles in the side of the gun, it allows it to move up and down easily, and be configered to aim any direction. Not totally smooth in rotation but perfect for setting up pics. I threw on some super glue and then cut some old plastic from a model to make the top bracket for support. Bc my big ass is likely to hit the thing and rip it off.
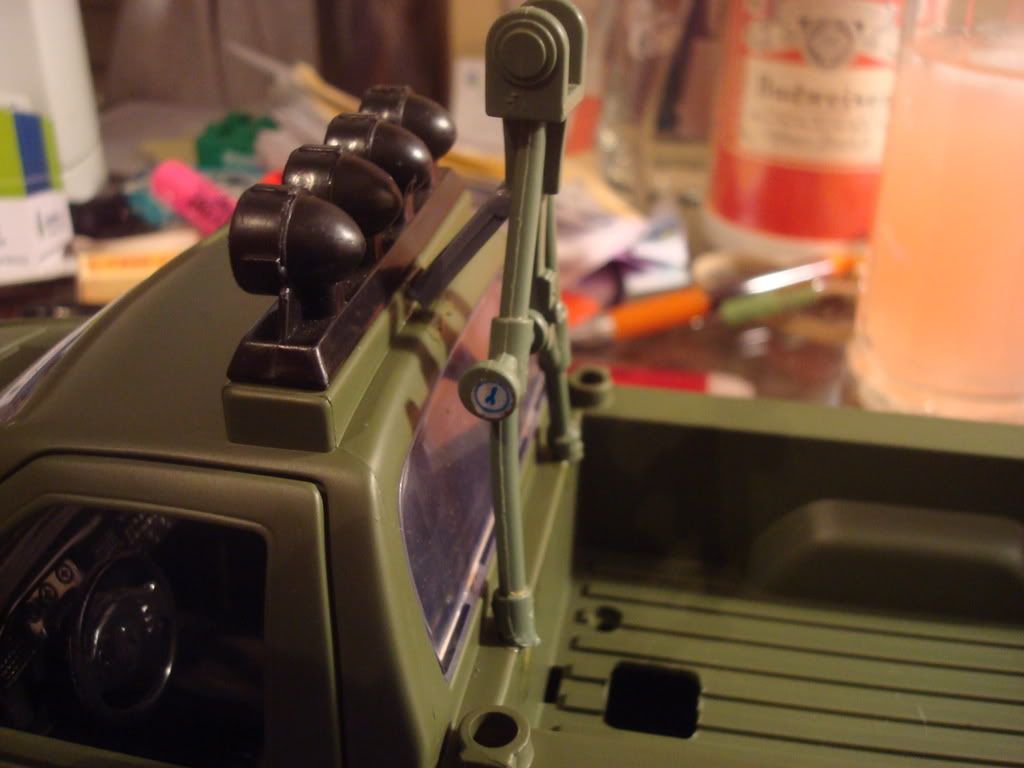 |
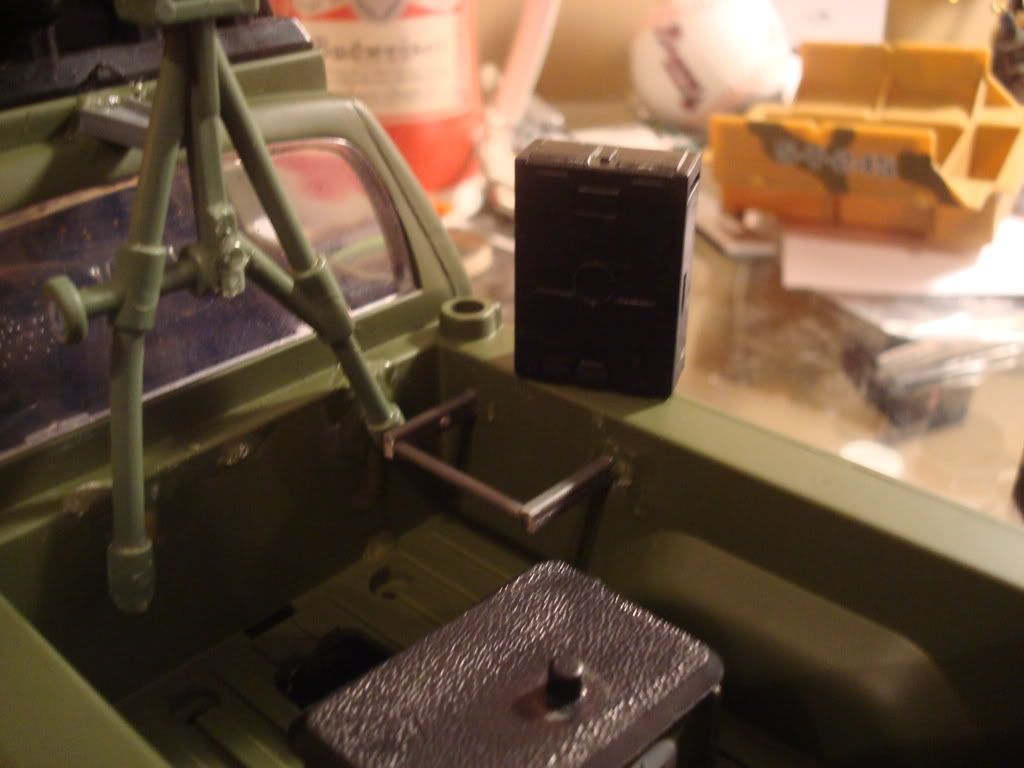
lights
bc of the spotlights on the cab, I had to mount the gun holder higher than a joe can stand in the bed and aim. So I built a step. I used an old box with U.S. sticker on it for a base. I left the stickers on bc I figure if your using a pickup, you would use whatever you could from enemy forces. Then I mount an old joe stand on it. One, it smoothes it out, and Two it will make it hella easy to pose in picks :D
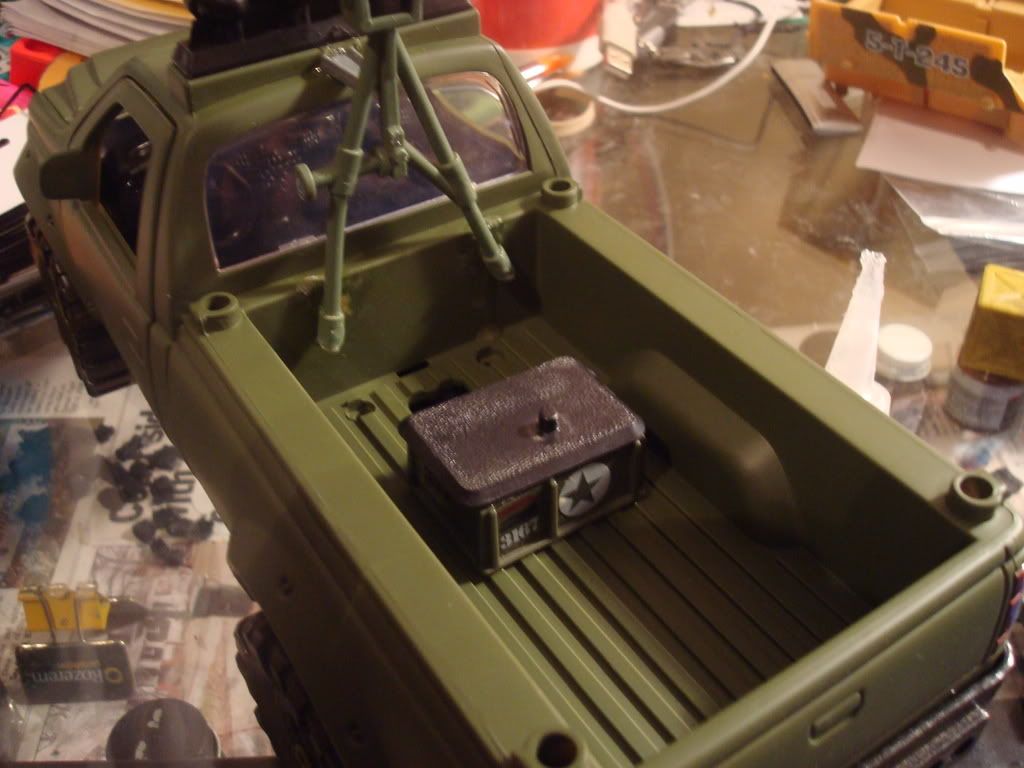 |
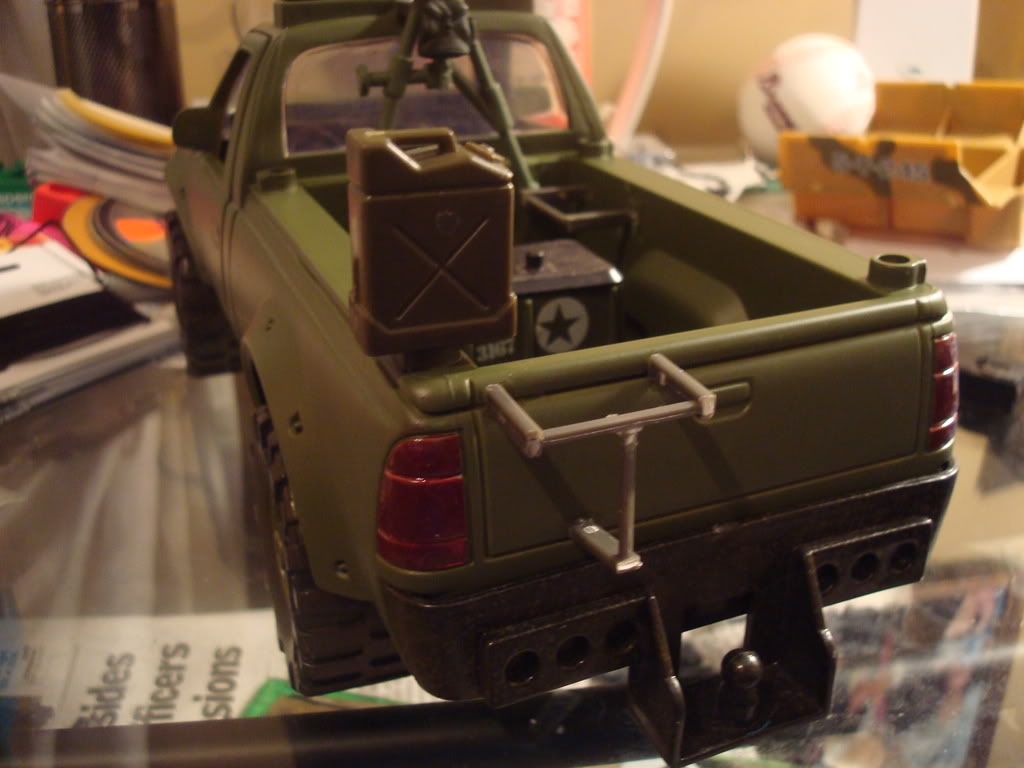
ammo
Here is when I incorporate my most favorite piece of customizing equipment. A ladder from maruders. You can cut the thing up and use it for all kinds of things. Here I made a bracket to hold the ammo box for the big gun. In a pickup at high speeds it could fly around everywhere. So I cut the peg off the backpack of a 25th roadblock to use as the ammo case and then cut the ladder to fit, a little superglue and bam! instant bracket.
 |
brackets
since I was in a ladder cutting sort of mood, I cut, glued and made a bracket to hold a gas/water canister for the back
 |
well
Well, here is where I am at so far, I sprayed it last night and did all the work this afternoon, but I need to go out and find some "piping" to create a rollcage for the back. Pretty nice so far, still needs some work and alot of painting, but, I think it will be pretty damn sweet.
Any ideas for what to use for the roll-bar material? 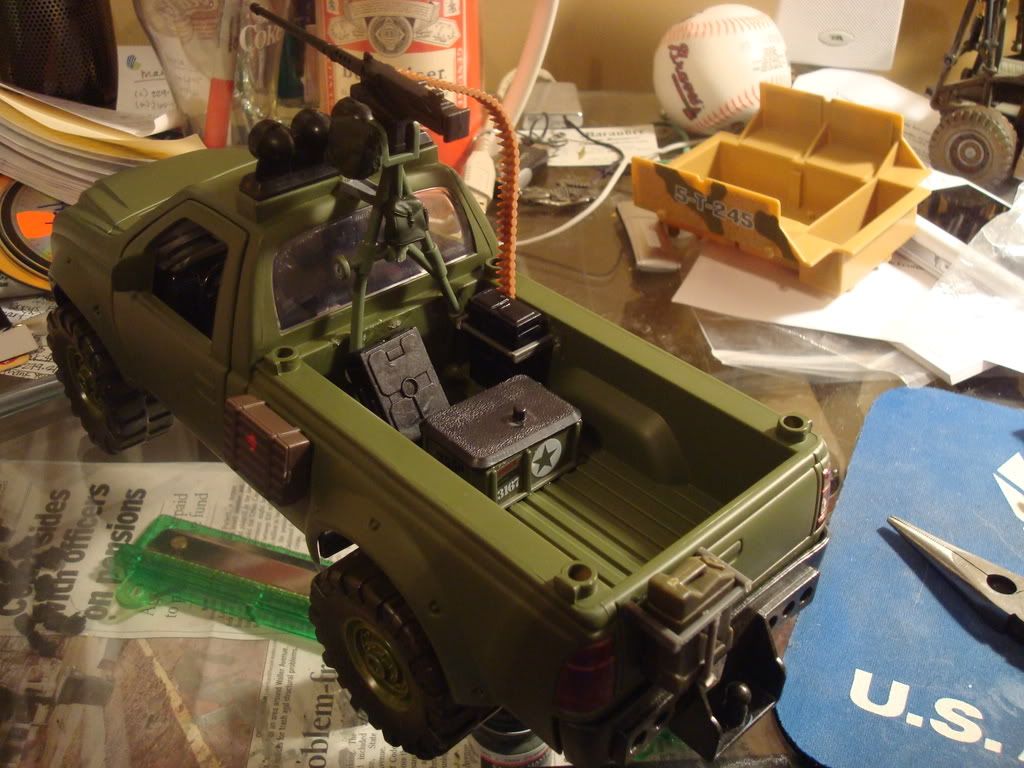 |
Bamb!
Thanks for posting this how-to Cory... my son and I want to try our hand at customizing a vehicle. This is mucho helpful.
I like how you're using just odd parts from other sets, a ladder from Marauder etc... works wonders and fits. The gas can and holder on the tailgate is schweet. Will you be showing us how to dry-brush on mud and surface rust, body wear etc? I'm looking forward to that. Cheers! ~ Paul. |
yea, you know it! Always the last, and my favorite, step. I'll keep taking pics as I go. Glad you like, considering what you and you son do with sets, building a vehicle ought to be a simple task. -cor
|
This is great, thanks Cory! I have a few vehicles that I plan on painting when it gets warmer out (so, in about 4-5 months...stupid weather in NE Ohio...). That truck is frakkin' awesome. Can't wait for more!
|
Great job C Man!!
If i try that it'd be deformed, the gun hanging sideways... I like your collection of "bottles" in the background. ;) |
Looks good so far.
|
Is that your fiance in the pic behind the truck? Nice work! Oh yeah, the truck looks good too. :)
|
lol, yep thats my baby
|
Looking good all the way baby!
I have about 5 or so vehicle projects that I have yet to start! I hope this serves as some inspiration for me! (it was definitely the high point of my joedios day). I might do something similar, but I will probably paint it in the zebra colors from Black hawk down (to all who have the dvd, find a scene with the truck with the 50 cal and you'll know what I'm talking about). Keep up the good work man, loving it every step of the way! |
That is very cool!
|
sorry guys, me and Rachel are in Vegas till monday (Yea real sorry :) lol) sorry I can't put the new pics up till then, but it looks good! stay tuned!
|
Viva Las Vegas man! I've been there 3 times and am going back for my 4th time in a couple of months. Have fun! Can't wait to see more!
|
You definitely went the extra mile with this in the start.
I have a Humvee project up now, but when I saw how much I had to remove to get to the "guts" of it, I skipped/cheated my way around that part. If you need some inspiration for weathering then my post might help ( ? ) - Or you might want to go in a completely different direction! - I like my vehicles dirty, scraped up and looking pretty abused. And there are also a lot more techniques on how to weather a vehicle then the short explanations I have in my article. I'm looking forward to how this assault pick-up will turn out in the end. It definitely served as inspiration for me when I started working with my stuff! :) |
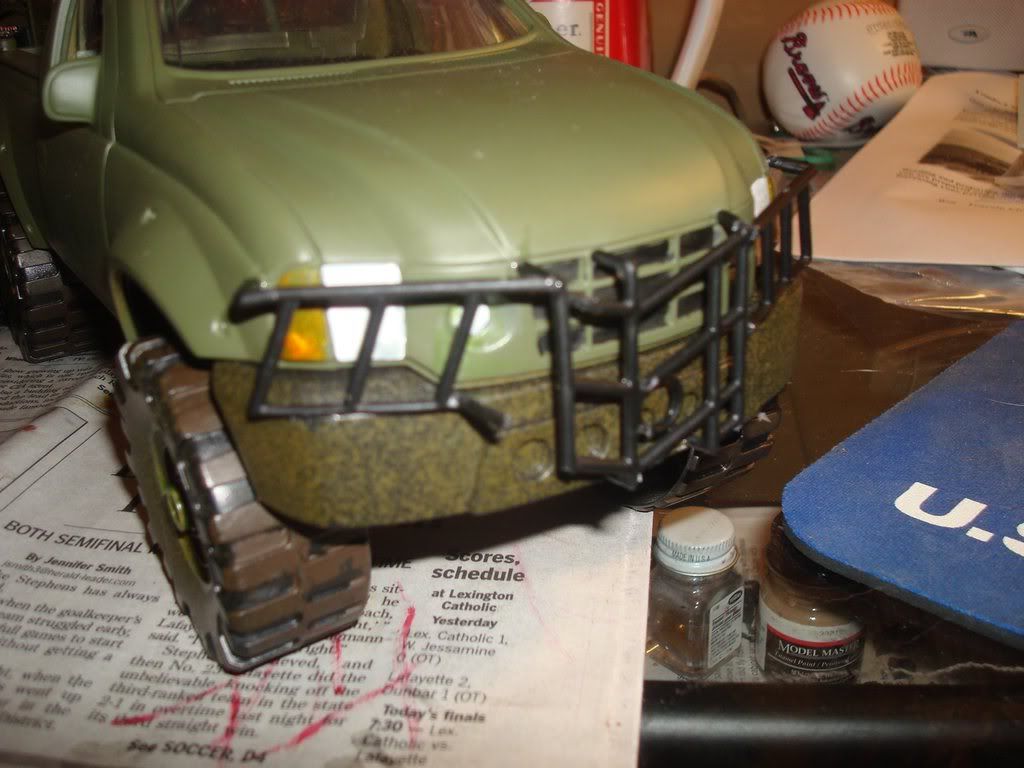
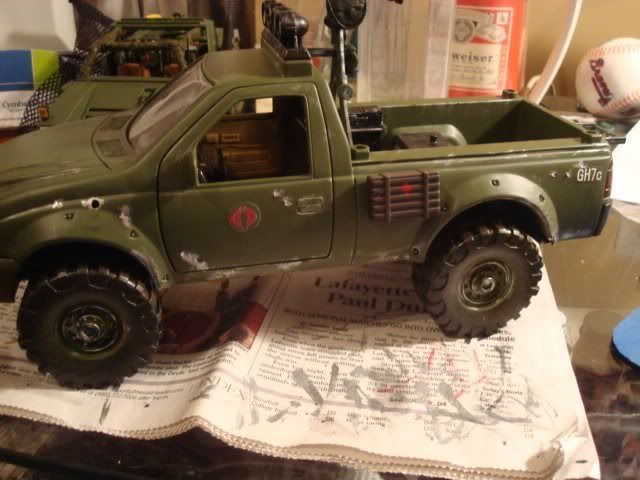
Front Grill
So the pickup definitly has to have some sort of brush bar to protect the radiator when bashing through road blocks. I tried several brush bars that I have off different hummers and trucks but they all came off looking, way TOO cool. This is supposed to be a low budget Cobra conversion so I couldn't use them. Instead I took the undercarriage off a Majesto hummer, cut it a little and formed it into a grill. I mangled it up like it like it has seen damage and its un symetric design, screams just welded together in minutes. Once painted it will look sweet.
 |
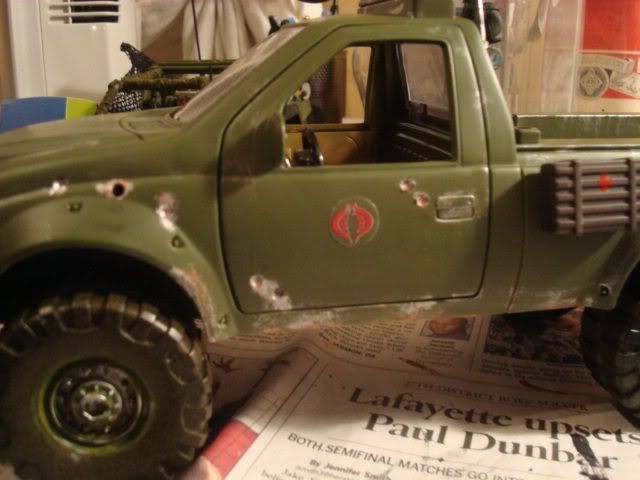
damage control
So before I start painting, I wanted some battle damage. I took a small drill bit and used my dremel to make some bullet holes and mess up the fenders. I also used my dremel to hollow out one of the spot lights on top of the cab for that "shot out" look.
  |
painting
When I go to weather and paint I use 4 steps
Black Silver Rust Mud So I started with black and colored in all the damage and added some general dirty streaks  |
silver time
now its time to go nuts with bare metal!
 |
rust
no to add a little rust to the areas of metal
 |
dirty fun
time to add some mud.
Now this my personl favorite trick. I have a little bottle of brown paint I never shake and mix. I dip my bottle deep in it and put a glob of the paint on the truck, then I use a piece of paper to smear it in like mud 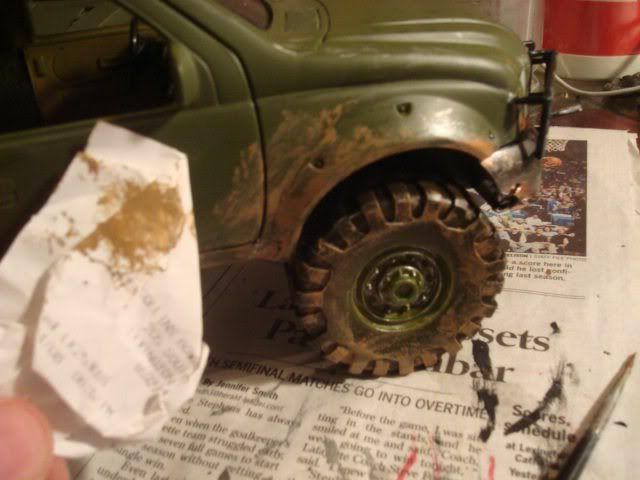 I guess the type of paper doesn't matter, But don't use news paper bc it absorbs and rips easily. I usually use reciepts because there finish doesn't absorb and I have tons of them, lol |
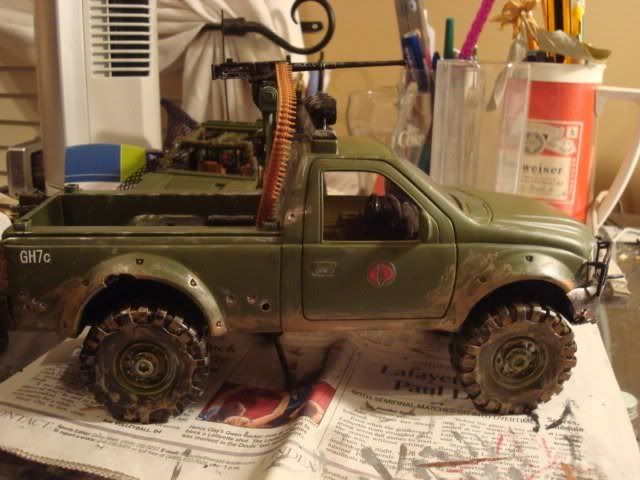
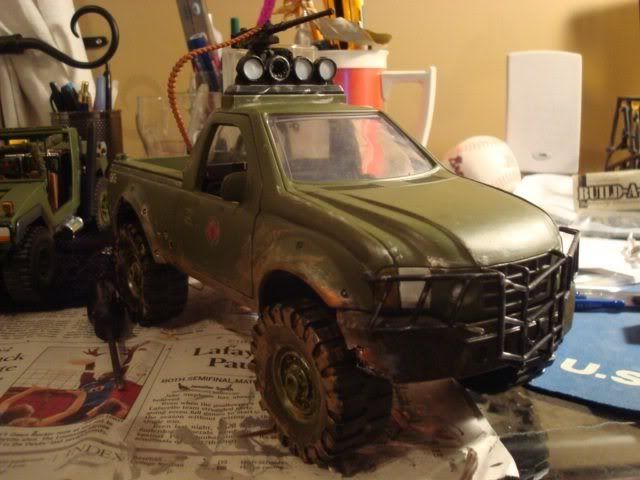
final result!
still waiting on some roll-bar stuff, here is the final result for now. Enjoy, hope it helps.
     |
Amazing job man! Someday, something like this MIGHT just have to be attempted by me. I love the battle damage. That's battle damage done right, right there! Kudos!
(Vegas definitely can be a bitch...3 times out, 3 times down $500...but, man was it fun losing it, haha :rolleyes: ) |
Looking real awesome man!
|
Wow! very coolio - the battle damage is a nice touch. I laughed at your trick of using an old receipt to smudge on the mud.... would have never thought of that cause it's so out there!
Love where this is going. Looking very fantabulous! Pickup truck is a good choice for Cobra to troll the strip and pick up some lucious beyotches! mmm mmmm good. Cheers! ~ Paul. |
| All times are GMT -7. The time now is 02:48 PM. |
Powered by: vBulletin Version 3.0.6
Copyright ©2000 - 2024, Jelsoft Enterprises Ltd.