How to build a set OR Kitbashing and you
3 Attachment(s)
Due to a request from someone I consider to be a ninja master at taking pictures of GI Joes, I have put together a How-To. The first two pics should be an expanded view of the entire set. It shows the foamboard walls and floors. I got mine from Walmart for around 4 bucks apiece. They are held together with masking tape. The other shot shows a kitbashed computer console. It is made from a playset I got at a thrift store for 3 dollars. The console is a flat piece of plastic with radio and dashboard pieces from 1:18 scale cars. Don't ask what I do with the cars. The map is from an atlas I got from a thrift store for 52 cents.
|
part 2
3 Attachment(s)
the ducting/wall piece is the roof from an HO scale train set building. I happen to have a lot of old train set stuff. I did model training for a long time, but it is very expensive, time consuming, bulky, and very expensive. The "computer base" is a piece of a toy firetruck I got from a thrift store. I dremeled it apart into component pieces. One will be shown later. It got spray painted silver to simulate chrome or metal. The computer piece from the new DVD pack does not sit flat, that can be fixed easily enough with some tape or paper wedges.
|
part 3
2 Attachment(s)
This is a control panel from the aforementioned firetruck. It has gauges, dials and other widgets with a coating of some black paint to highlight the details. When turned to the side, you can see that it is hollow and was hacked out of something else.
|
part 4
2 Attachment(s)
This is another train piece. When on its side, it looks like a metal bin or corrugated wall something or other. It is actually a small outbuilding. HO scale train stuff is pretty cool. Did I mention it is very expensive?
|
part 5?
2 Attachment(s)
The big silver wall is the top of an old cable box. It is the easiest set piece ever. I unscrewed it from the bottom of the old cable box. The fan is an old fan from my old computer that stopped working. It has a yellow wire running to that silver think. I'm not sure what that is, but it looks like a heater or cooling vent, or maybe a technical gizmo. The trick is to find small thinks that look like something else.
|
part: the next one
3 Attachment(s)
This is at the other end of the cable box top. (note: if you are from the cable company, I sent this box back to you, so don't charge me for it.) It is a wall part from another train building, a trainyard tool shed, tape, and wire. The molded tools are a nice touch to the train set, but are terribly small for Gi Joe. When shot from the right angle, it looks like a heavy metal doorway. I added a small phone/GPS thinkie to it to look like a control panel to operate the door.
|
part 7
2 Attachment(s)
The garage door is the cover from a scrapbook. It looks like corrugated metal. I stole this idea from Outrider, another great ninja master. The foam boards are held together with masking tape. It needs a chain or rope to look like what you would use to open the door.
|
part 8
2 Attachment(s)
I painstakingly crafted this shelving unit from scratch. It took years.
Not really, I got it from a thrift store for a dollar or something. The doors were pink. I spray painted the whole think to an off-white. It's pretty cool to put gear and stuff on to look like people are using it. The map is from that old atlas. I cut out the picture using scissors. The map has made several appearances in my photos and looks like a zoned map of the US. I imagine it to represent flight zones or territory divisions that are under the jurisdiction of various Cobra and Joe commands. |
The end
If you have enough set pieces, you can make an endless combination of modular sets. Keep your eyes open for little stuff you can add to a foamboard or wall piece to add some detail. Spend thousands on train buildings in order to convert a small fraction to set pieces. Go to Goodwill or the Salvation Army and buy dirty, smelly toys that have cool details. The only limit is your imagination and maybe your wife telling you to stop buying so much crap for your stupid toys. (My wife is actually very cool about my hobby. It is much cheaper than golf or heavy drinking.)
And I apologize for the small pictures. It was the only way I could make them small enough to post here. You can always use your zoom tool on them. |
Inspiring Kid
THE KID IS SPEAKS THE TRUTH. THINKTANK IS THE TRUTH!! :cool:
|
Thanks for the how to looks like i need to get some foam board and perhaps stop by the model train store
|
Kitbashing and you, Part 2
2 Attachment(s)
Instead of starting a new How-to thread, I will just add to my old one...It's all the same type stuff anyway. The first one should be how I added the blue lighting to my lab setup. I used painters tape to strap the lights to the metal flap from that old versatile cable box. Taping them in different directions floods the set so you dont have so many shadows. Next is the side view of the back wall. As you can see, I had to bend some of the places it was attached. That stuff on the wall is from the circuit board inside the cable box. The silver mechanical looking stuff is from an old Tomy insect toy with armor plating. I painted it and weathered it, then hot-glued it all on. Jam in some wires to connect some of the stuff and there you go.
|
2 Attachment(s)
The red light was removed from a crappy playset I got at Savers, a local thrift store. I black-taped the wires so I wouldn't pull them apart. When you push the button, the light comes on and it used to make "fwoosh" noises. I cut off the tiny speaker because I dont like to hear "fwoosh" when I take pictures. Next is another view of the toy debris hotglued to the wall.
|
1 Attachment(s)
I have another wall to make from the cable box. I'm going to start documenting when I kitbash stuff and keep this thread going. I will also "sneak preview" some stuff as I work on it. It's amazing what kind of stuff you can buy from the Salvation Army for less than a dollar.
|
Sneak Peek of Mini Helicopter Pad/Watch Tower
1 Attachment(s)
I found this giant playset at the Salvation Army. I paid 74 cents for it. It is almost 2 feet tall and has really cool details. It is almost to scale and with a few fixes I think it will look pretty cool. Ima use it for FANG's and CLAW's, like a Cobra airstation or something. The second level will be for lookouts and a weapon station. It needs some work and I will be kitbashing it until I'm satisfied. I believe it is a Rescue Heroes playsetmade by Fisher Price. The ruler is there to show how tall this think is.
|
Overhead door chain
Great work you're doing! I had a couple of ideas for a chain for your overhead door. How about the chain from an ink pen like at the banks. Or a cheap necklace chain from Wal-Mart or Claire's Boutique. By the way, where did you find the scrapbook for the corrugated "metal"? Keep up the awesome work!
|
thanks for the idea! I actually found a chain from my ID badge that will work, but I "misplaced" it for now. I found the scrapbook in my desk at work. It seems the previous occupant left it with some other stuff. I promise I gave it back to her! I think you can get them at Wal-Mart or any hobby store.
|
There are some really cool ideas in here! Keep up the great work!
|
http://s530.photobucket.com/albums/...Tank989/How-to/
i put up some new How-To photos on my photobucket. There is not a lot of text right now, but the pics kind of explain themselves. Random stuff plus random stuff can make some pretty decent looking items. |
This is big help to me. Thanks again!
|
Great thread! Keep it going! I need to find me some lights.
|
lighted Star Wars dio piece
 From deep inside Echo base comes a map screen that is pretty cool. I taped a piece of map from the atlas and put some foam board over the opening so light wouldn't come through. I darkened some of the lines on the map with a paint pen. |
lighted Star Wars dio piece
 The lighting was done with some LED lightboxes from that halloween light set. I originally had other stuff in set up for the original picture, but they got lit up and ruined the effect. This is a rough recreation but with some clear plastic and a picture you could do just about anythink with it. |
Quote:
I am new to all this and now I am on a tight budget i thought it would be near impossible to do something decent. The stuff shown and described here is priceless. this is really helpful, Thankyou... |
Quote:
Same here but my hobby is way more expensive than heavy drinking! :D |
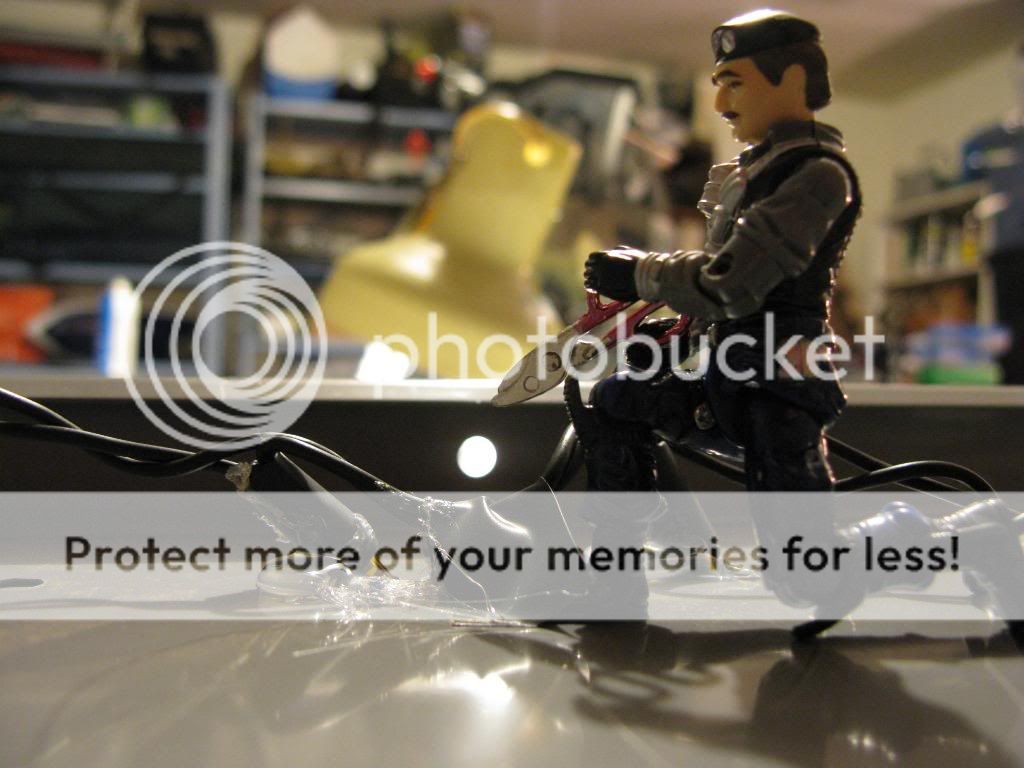
How I did that Lamprey! shot
It wasn't a screen and I dont do any photoshopping. It was all natural baby! Heres the rundown.
I have a pencil box with blue top that I put random stuff in. I think this is the stuff I was using to customize my RHINO.  It has a nice blue top, so I thought it might put a good blue light over the figure, which is how I wanted the shot to look, underwatery, I was thinking a sunken ship with a glass bottom or a big viewing window. I stood it on end and propped it up.  I have a booklight that I use a lot. It is really bright and has it's own bluish tint.  Put the light behind the box and turn off the overhead light. Dont forget to put a figure in front!  Here's how it looks pulled back to see the whole think. The green light on the figure was from using the flashlight app on my Iphone. It is a great accessory, it has red, blue, white and green screens to give some life to my pics.  Overall, a very simple and easy setup, which is good, because I'm pretty lazy and pressed for time. |
Brilliant effect!
|
The Birdhouse How-To
I made this set for a contest at goodtogocustoms.com. I knew I needed to go pretty big and pretty detailed. Since I dont have my train layout tables anymore, I had to improvise. I connected the two tables in my garage with large doweling rods, hot glue, and tape. While it wont hold lots of weight, it is perfect for the setup.
     |
The Birdhouse How-To
After connecting the tables, I got the computer desk stand up part and laid it down with more hot glue. I have used this big wooden piece for several of my layouts. I suggest you secure one from your local dumpster or place of work. This shot is actually before I pulled the tables apart and connected them with the doweling rods.
 After securing the the wooden piece, I laid down the base flooring, which is foamboard pieces. I had to buy some new ones because some of the ones I had were warped. They get all wavy after you spray paint them.  After the base flooring is laid down, I put down the side building that would become the "bunkhouse." It kind of looks like a cinder block, but it is a wooden box that I got from a thrift store. It had metal dividers and the lady at the store said it was "magic trick box." It was painted blue and had really crappy stars and rabbits painted on it. Stone texture spray paint covered it up nicely and goes over the wood grain to make it look just like concrete. I added the Tech Deck stair pieces to access the eventual roof. They are not affixed to allow access to the rooms. The "L" shaped wall in front of it is the drawer holder from an old BBQ grill, spray painted.  |
This is one of the garage bays. It used to be a toy oven. I got it from a thrift store for 3 dollars. After removing the door and bottom and painting it with stone texture, it looks pretty good for a garage type space. I removed the top and drilled holes to add lights. You can see it in the left of the picture in the previous post.
 I held the lights down with tape and then hot glued it all together, so they wouldn't move. I hope they aren't the cheap lights that will all stop working if one bulb goes out. That would really suck.  |
Here is a shot with the base flooring all done, with some elements in place.
 After this flooring was down, Wifey had a damn good idea, "Why dont you get some roofing shingles to make the ground look like a parking lot?" She is pretty smart. I went to Home Depot forthwith and came back with a pack of shingles for 18 dollars, which is pretty pricey for me on somethink like this. I only had to use a few and still have most of them left. The yardsticks are to show how freaking big this turned out be.    |
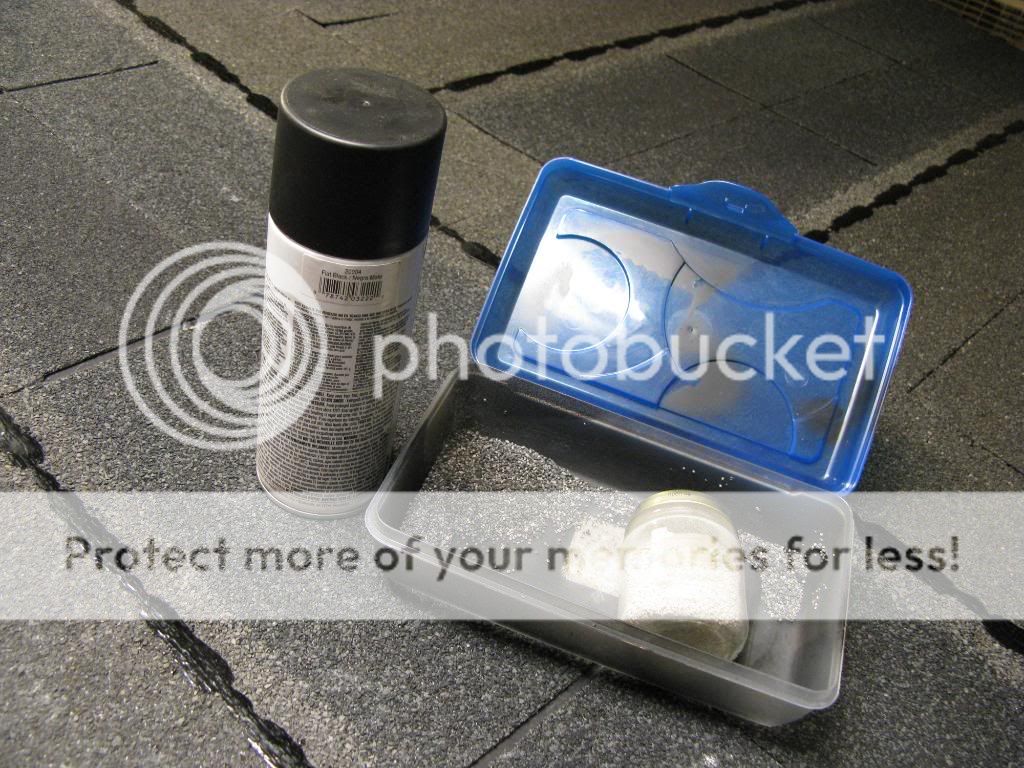
The asphalt presented a problem, big gaps in places because of the way they are made. I used my little white rocks from the train days. I spray painted them inside of a box and then shook it up. This took several applications and then used spray adhesive to hold them down. After a few more apps of black paint, and then spraying down the shingles, it blended well enough and looked real enough for me. On a side note, open your garage door when you spray paint inside of it. Trust me, do not skip that part.
  |
Here we have the heli-pad. It is an extra shelf from the metal shelving units that were liberated by the forces of freedom from the evil clutches of an unnamed corporate entity and was originally light blue. It got painted olive Krylon. I made big "H"s after doing a little research on how a helipad is supposed to be laid out. Did you know the H is supposed to be in white and point north? I didn't. I also think that I know what "frangible" means now. After masking off the rest of the pad, I painted in the H's.
   |
Here is Dial-Tone helping out. The shelf conveniently had holes in it already. I used the same tape and glue method to hold in the lights, which I got around Halloween for their wicked orange-ness.
   |
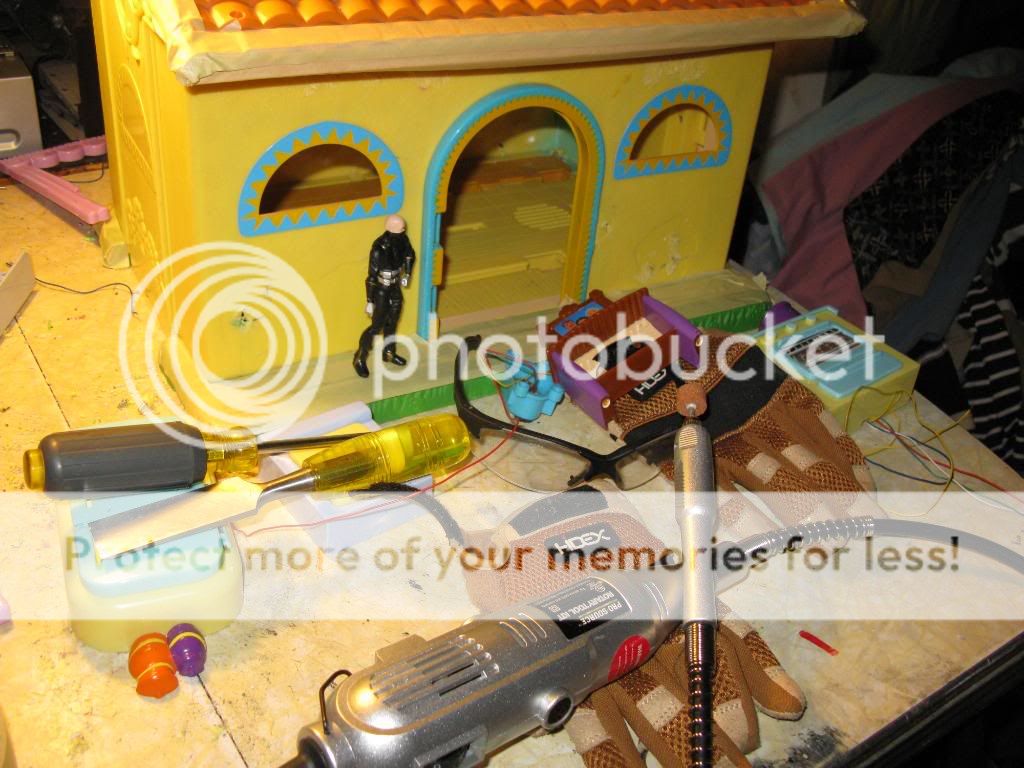
Dora who?
I got this blindingly yellow Dora the Explorer House at a thrift store for 5 bucks. It is actually pretty cool and fairly close to scale on the inside. It had lots of stuff inside, like cabinets, a shower and a full kitchen. It also had annoyingly cheerful and frightfully colorful flower pots, door bells and columns in the front. A Dremel and a screwdriver fixed these problems. I recommend wearing gloves and eye protection when you tear up stuff or use a rotary tool. I would have been blinded at least 3 times during the making of this set, and the gloves saved me from a trip to the emergency room after cutting off a screw, getting distracted and then touching the hot, sharp screw part that was sticking out that also had melted plastic on it. It sliced/melted through the glove and cut me and deposited some plastic under my skin. Without the glove, I am pretty sure I would have needed stitches instead of some ice and ibuprofen. (and beer)
   |
The Wrap up
The rest was just detailing, painting and moving stuff around. I made the fence from screen door material, wooden doweling rods and tiny cable ties. I used almost every set piece I have ever made on this thing and almost 3 bags of the fat glue sticks. I used lots of spray paint and spent many long nights out in the cold garage. I know, poor me. I even went and bought an overhead light for my dark ass garage. It was only 10 bucks at Walmart! I was sure it was going to be at least 40 dollars. Here are some shots of the work area, just for fun. Also, a shot of the whole think with the lights on. I want to space out the "good shots" for awhile.
   |
I don't envy HOW you're gonna do backgrounds for this thing. Be it fotoshopped or whatever.
|
THx for sharing. This set is awesome. F'n awesome. :cool:
|
Requested How-To
I got a request for this, so here goes.
The BAT cage is a storage drawer turned on end with the BAT's in the drawers. I rested lights on top to shine through into the "cells."  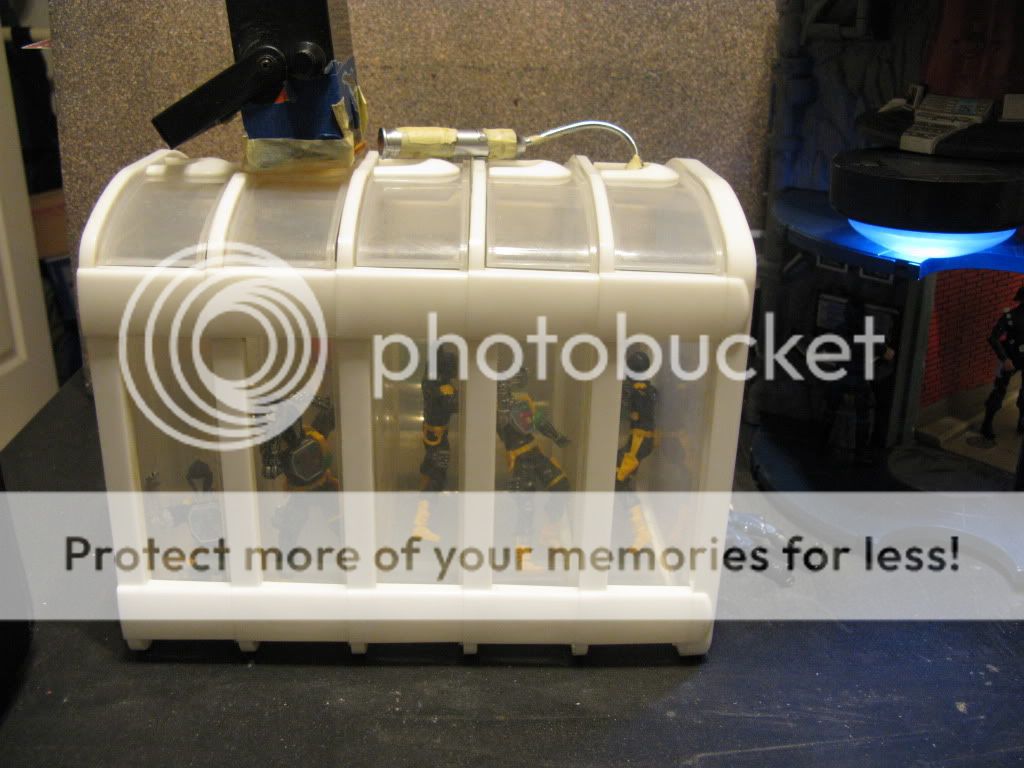 |
Here's a side view. The back wall is a foamboard painted with stone texture spray paint.
 Here's the trooper through the door and the back of the computer room set piece  Nothing special on this one. I just threw some existing pieces down and took the shot. |
| All times are GMT -7. The time now is 03:45 AM. |
Powered by: vBulletin Version 3.0.6
Copyright ©2000 - 2024, Jelsoft Enterprises Ltd.