Building a forest / jungle set
I had written several forest scenes into my ongoing dio-story, but
wondered where to shoot the scenes. I knew I did not want to go outside :( , so I tried using small plants and slightly damp soil but found scale to be a problem. So I decided to build my own set, complete with scratch-built trees and undergrowth. Here's how I built it: I used: MDF board or similar, at least 4ft x 2ft. Crepe paper, assorted colours, particularly in shades of green, brown and purple Coloured tissue paper (mostly green and brown shades) Several twigs and sticks, assorted sizes Plasticine (green or brown colour is fine) Glue stick Scissors I took a piece of MDF board and painted it green to begin with. Green was just a base coat, so that the board colour wouldn't be seen during photography. Since real undergrowth is a mixture of colours, however, I more recently added shades of brown and purple paint to the board. 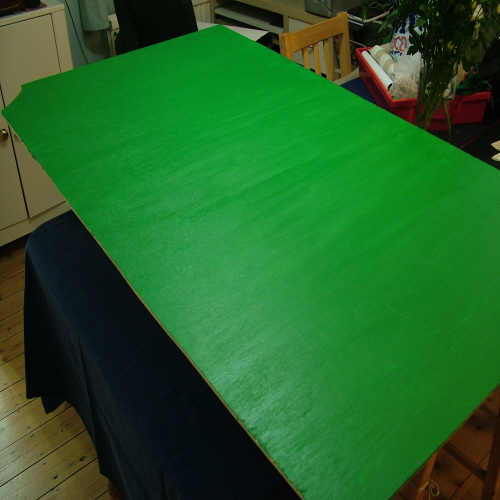 To make the shrubs and undergrowth, I took some of the coloured crepe paper and coloured tissue paper. I scrunched up fairly large pieces of tissue paper and glued it to the board in a random pattern. I then put spots of glue across the board, before cutting a whole lot of thin, spikey and angled pieces from the crepe paper and sprinkled them across the board, so they would be stuck on by the glue. 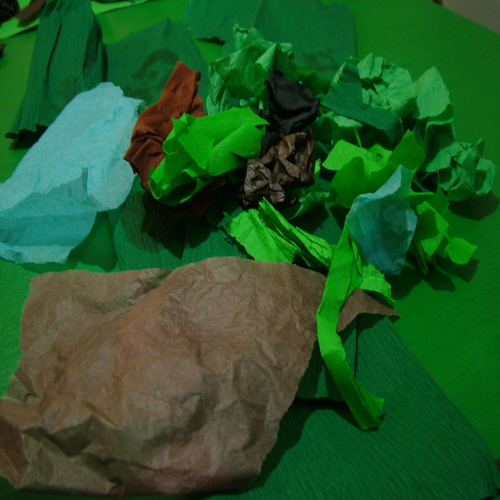 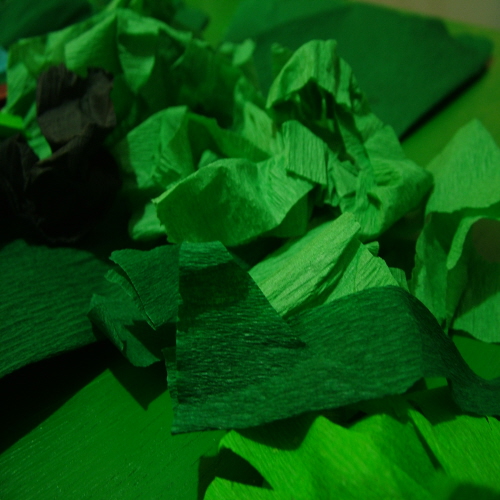 |
I made leaves of various sizes, both for the undergrowth and for the
trees. For undergrowth leaves, I took large pieces of crepe paper and folded them each like a concertina, with each fold directly on top of the previous fold. 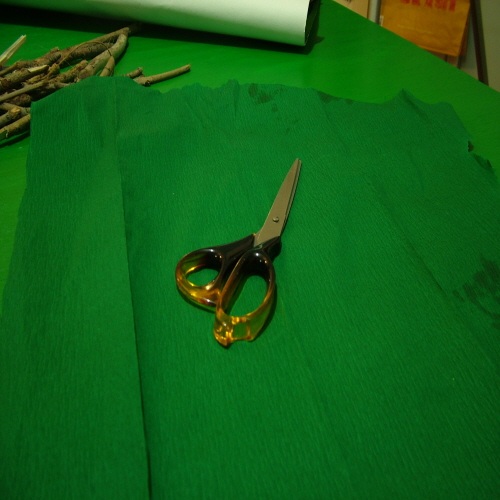 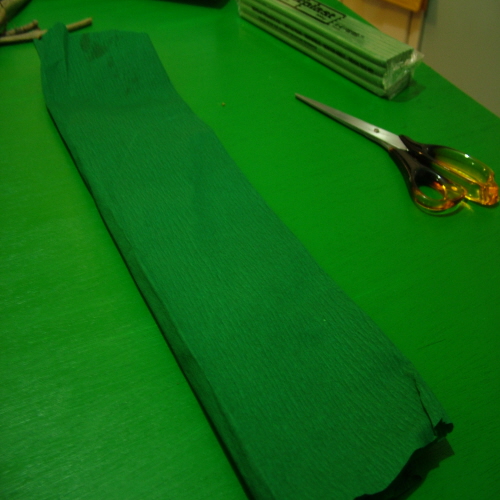 I then cut a leaf shape through all of the folded layers, so that one cut-out made several leaves simultaneously. I cut as many as each length of paper allowed. After this, I cut slits around the tops of one of the leaf sets. I then varied the cut details on other leaf sets; some had longer slits, some had curved slits, some had larger bits cut-out between each slit, etc etc. I also used different colours. 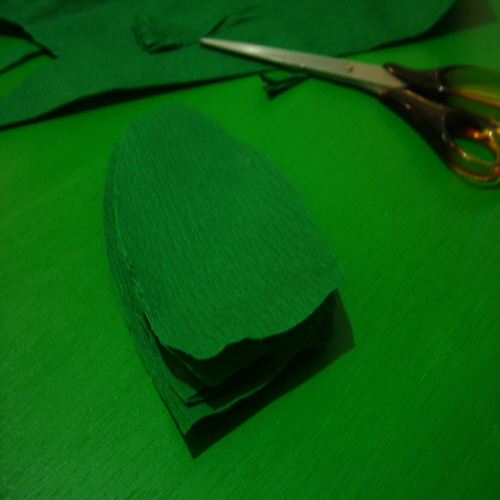 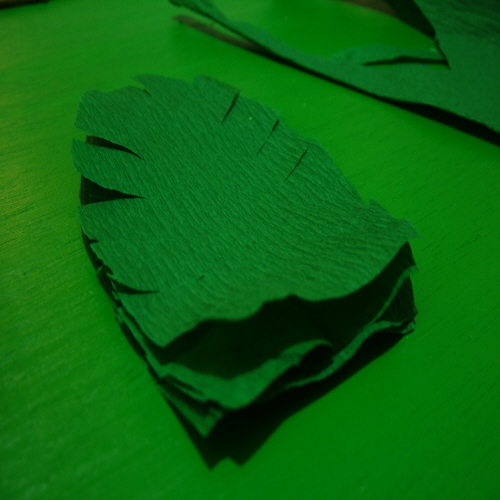 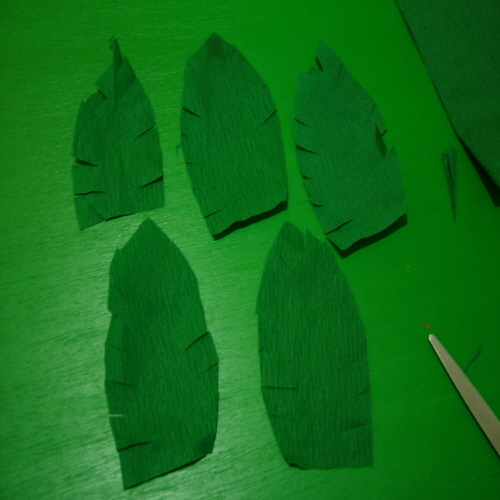  Some of these I glued to the base MDF board, either randomly placed or grouped with other bits of growth, and some I simply scattered across the board unglued, so that I could rearrange them as I needed when photographing the story. |
For the trees, I collected together various sized twigs I found outside, although
I still made sure that most of the twigs were somewhat taller than the modern sculpt joe figures. To make one tree, I took some green plasticine and rolled it into a ball. Picking up one twig (making sure to clean the twigs before use) I pushed one end into the plasticine ball. I sculpted part of the plasticine up the end of the twig, then pressed out the other end of the plasticine into a flat disc. This made the plasticine into a tree base, and it was then possible to stand the twig upright. 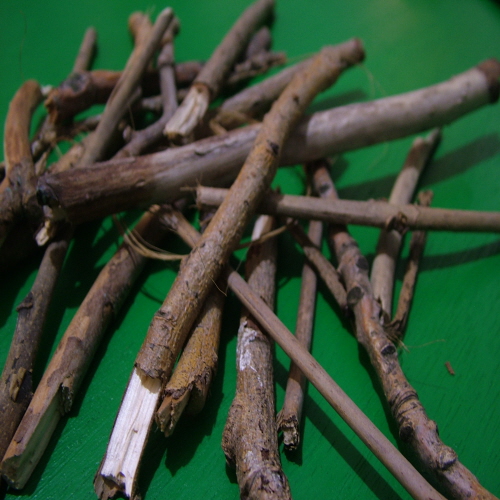 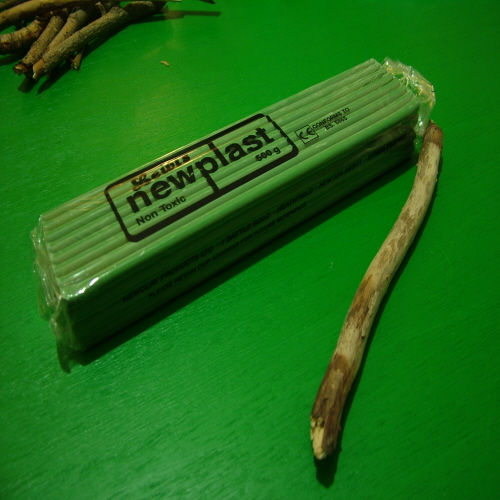 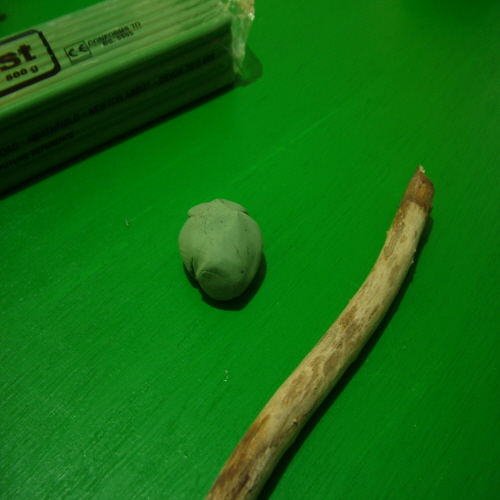 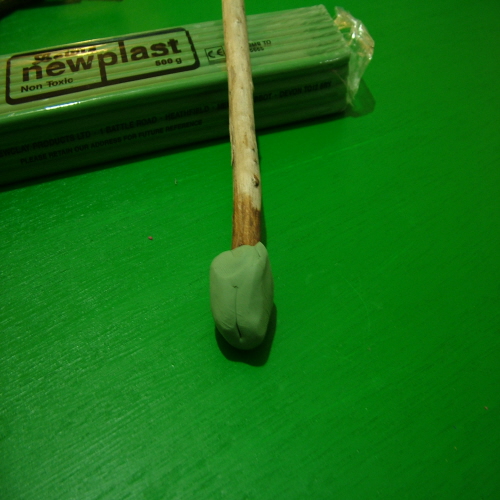 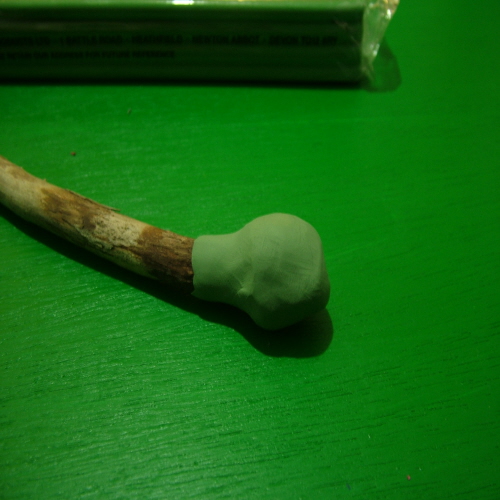 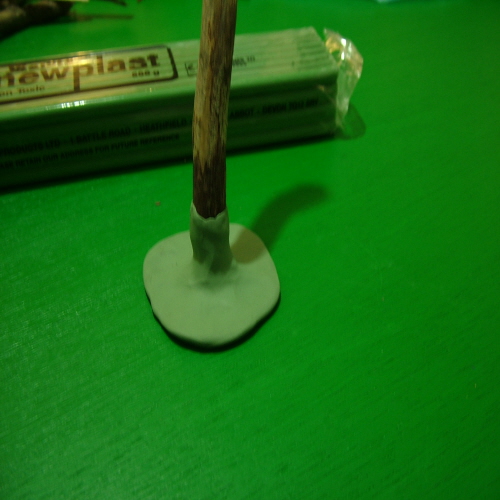 |
To disguise the plasticine base, I took some crepe paper and pressed it down onto the base, wrapping the paper around the base, which made it stick quite well and covered it up completely.
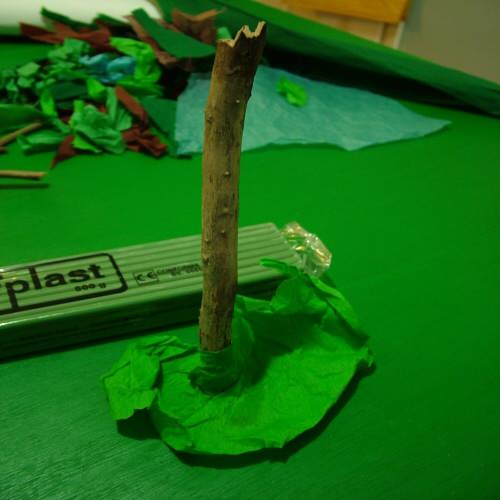 Filling out the tree required more crepe or tissue paper of various colours and the glue. Using some of the leaves I had cut out previously, I applied some glue onto the surface of the twig and stuck the leaves to the twig, wrapping part of the paper around it, but leaving most of the paper sticking out from the twig. Another method that I used to add growth the the tree was to fold pieces of crepe paper into puffs, stapling the bushy/puffy end and gluing the other end to the twig. Both of these methods worked well for me.  I experimented with different combinations of paper and twigs, colours and styles, until I had a nice collection of trees. 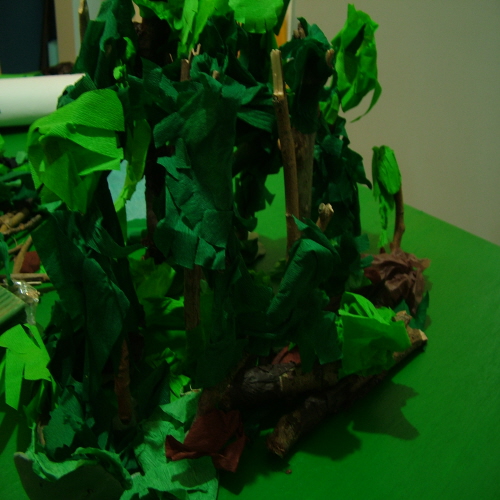 I then positioned the trees across the board, not too scattered, but not too close together either, and added some spare twigs and scrap, off-cut crepe and tissue paper for detail effects. 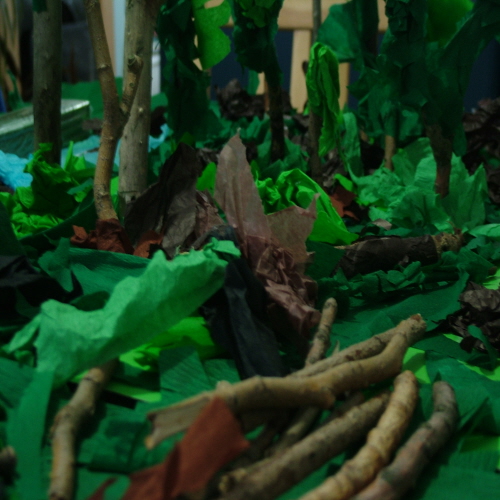  I also made a vertical backdrop in the same way as the undergrowth board. This ensures that, when photographing, the background blends in with the foreground seamlessly. This set can be made as large as is needed, particularly if two or more large vehicles are being used in the set. Using separate MDF boards makes it completely modular for disassembly and storage. I think a big part of this set relies on how it is photographed, at least it does for me. Doing close-ups and medium shots of figures in the forest provides the depth of field, and so the resulting, slightly blurred background adds to the "dense forest" effect, and also makes the set appear larger than it is. |
You should show it with figures.
|
Oops, that would help, wouldn't it??
Here are some pics of this set in use with figures. 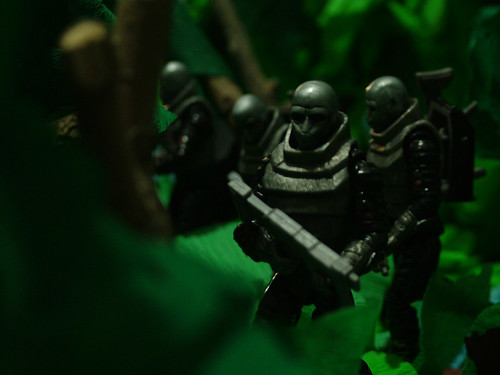 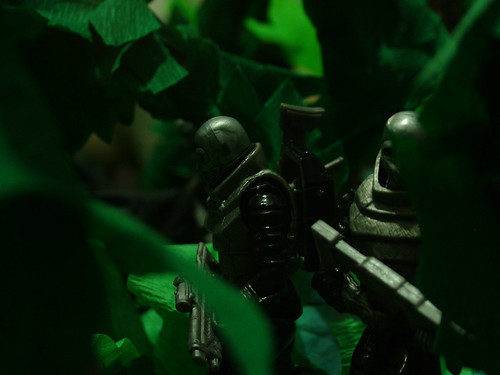 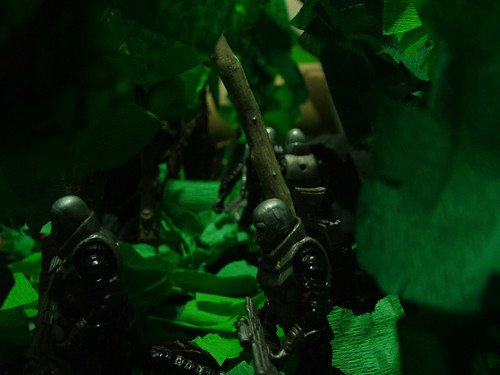  |
That looks great. I was not sure when reading your howto but after seeing the troops in there. I am sold and want to do this for myself.
|
Thanks For Share, Now I Have Many Ideas Around My Head For A Jungle Set
|
I'm curious on how to do a situation if they walk into an opening or something. How to do the ground...
|
Quote:
The following came to mind: 1) A shallow level of soil (dry or slightly damp) 2) A mix of coarse sand into greenish-brown paint. Paint an area of the base to make an opening in the trees. It should make an uneven, gritty, dirt-filled area. More detail can be added using tiny wood chips or cut-up twigs, sprinkled around. (a similar method to this can also be used to make particular desert scenes) 3) Undergrowth material from hobby / craft stores. The stuff used with train set models is really good for open areas between trees. 4) A combination of some or all of the above. There's bound to be more. Also have a look at the undergrowth in Footloose's dio pics. Very good stuff there. |
| All times are GMT -7. The time now is 02:06 PM. |
Powered by: vBulletin Version 3.0.6
Copyright ©2000 - 2025, Jelsoft Enterprises Ltd.